Creating Visitor Parking for Your Building
Covered in this KB article are the following:
- How to create New Parking Levels
- How to add, configure and manage parking bays
- How to make bookings
1. How to create New Parking Levels
If you manage more than one building, ensure you have selected the correct building that you wish to add visitor parking to.
- Select your building, by clicking on the down arrow next to the building name.
- If you manage more than one building, you will see a list of available buildings you have access to.
- If you only manage one building, there is no need to click on the down arrow next to the building name.

- Once you have the correct building selected, click on Community, located on the top menu bar to go to the Community Screen.

- From the Community Screen, select Parking to open the Visitor Parking Page.

- Visitor Car Spaces need to be added to Parking Levels.
- If there are no Parking Levels, you will need to create a new Parking Level
- Select New Parking Level to create it.
- Selecting New Parking Level will open a popup.

- Enter a new Parking Level Name. An example could be Level B1, etc.

- Click on Save & Add Another if you want to add more levels, otherwise click Save if have finished adding Parking Level Names.

2. How to add, configure and manage parking bays
Now that you have created your Parking Levels, you are ready to create your Visitor Parking Bay
Note the following options will now appear:
- Parking Information
- Calendar
- Parking Setup
- Select Add Parking Space to create a Visitor Parking Bay

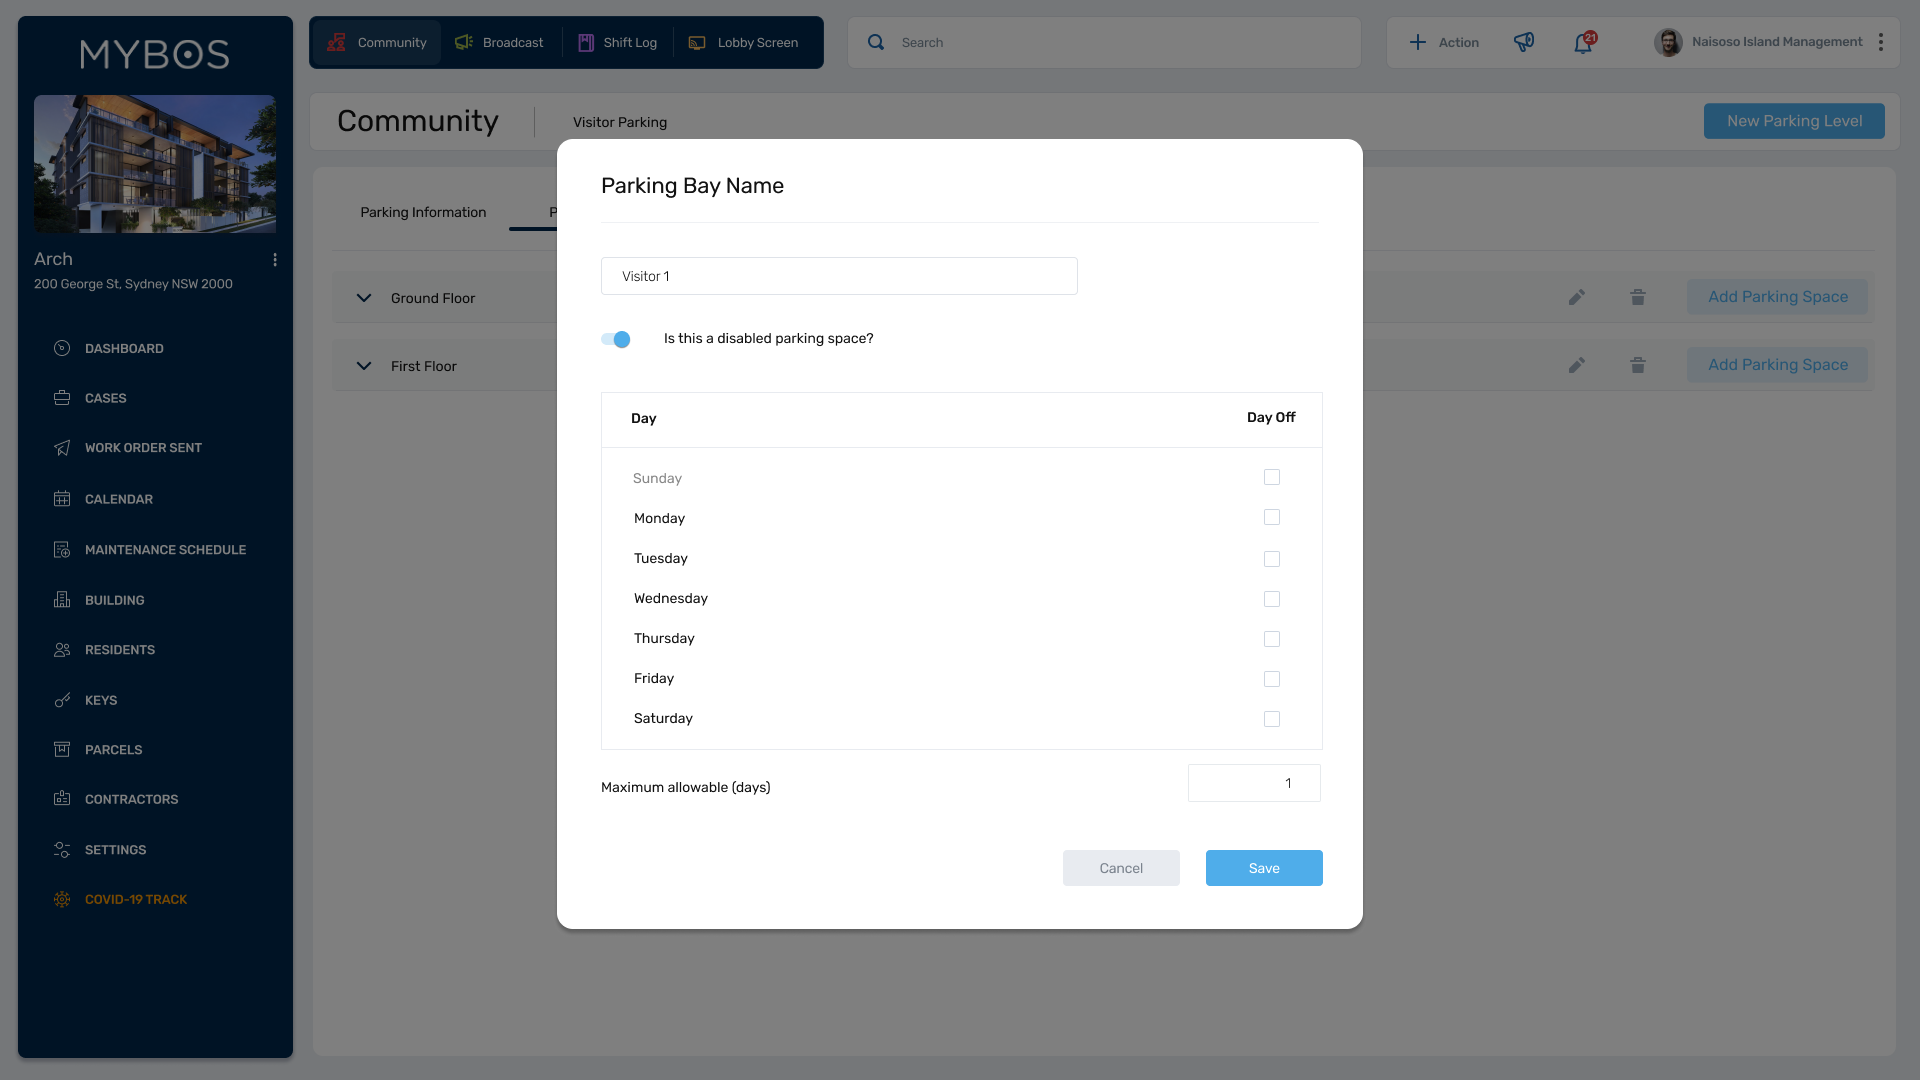
- A pop up will appear asking you to name your Visitor Parking Bay.
- Use the toggle to select whether this bay is designated as a disabled parking bay and also whether there are any set restrictions with this parking bay.
- Don't forget to save your newly created Parking Bay
- Repeat the above steps to create as many Visitor Parking Bays required.

- To setup any restrictions toggle the Set restrictions slider
- You can set Day Off by selecting the checkbox on the right-hand side.
- Day Off is when you want to disable a particular day of the week the visitor bay in unavailable.
- Select the maximum allowable (days) when you want to restrict the maximum booking time. This will be in days.
- Once you have setup your restrictions, don't forget to save.
- Repeat the same for any other parking bays you have created.
- The below example shows 2 Visitor Parking Bays located on Level B1.
- Visitor 1 is a Normal Parking Bay and Visitor 2 is a Disabled Parking Bay

3. How to make bookings
Visitor parking can be booked in 2 ways.
- Building management staff can book visitor parking on behalf of the resident which is automatically approved or,
- The resident can book on behalf of their guest which requires approval. This request remains pending until approved.
+
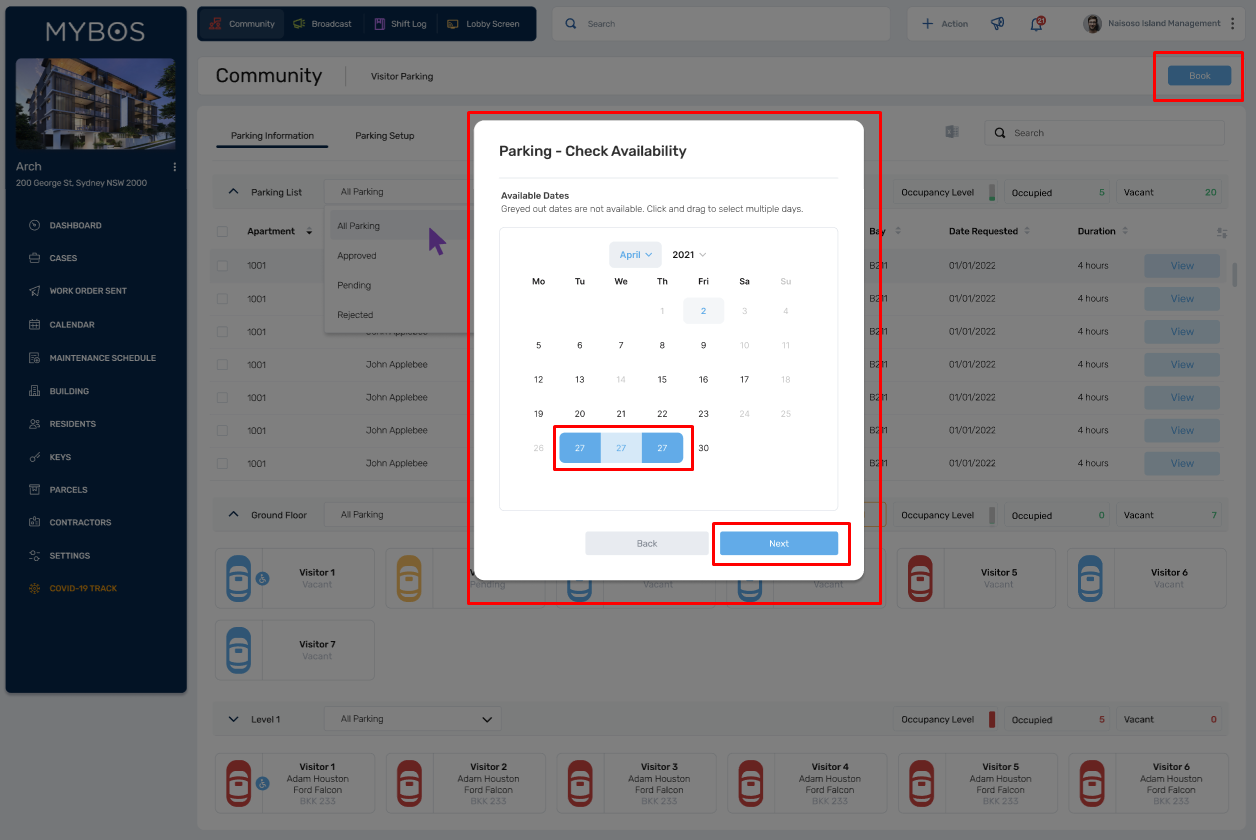
- Select Book
- Check availability and select the date or date range you would like to book
- Select Next
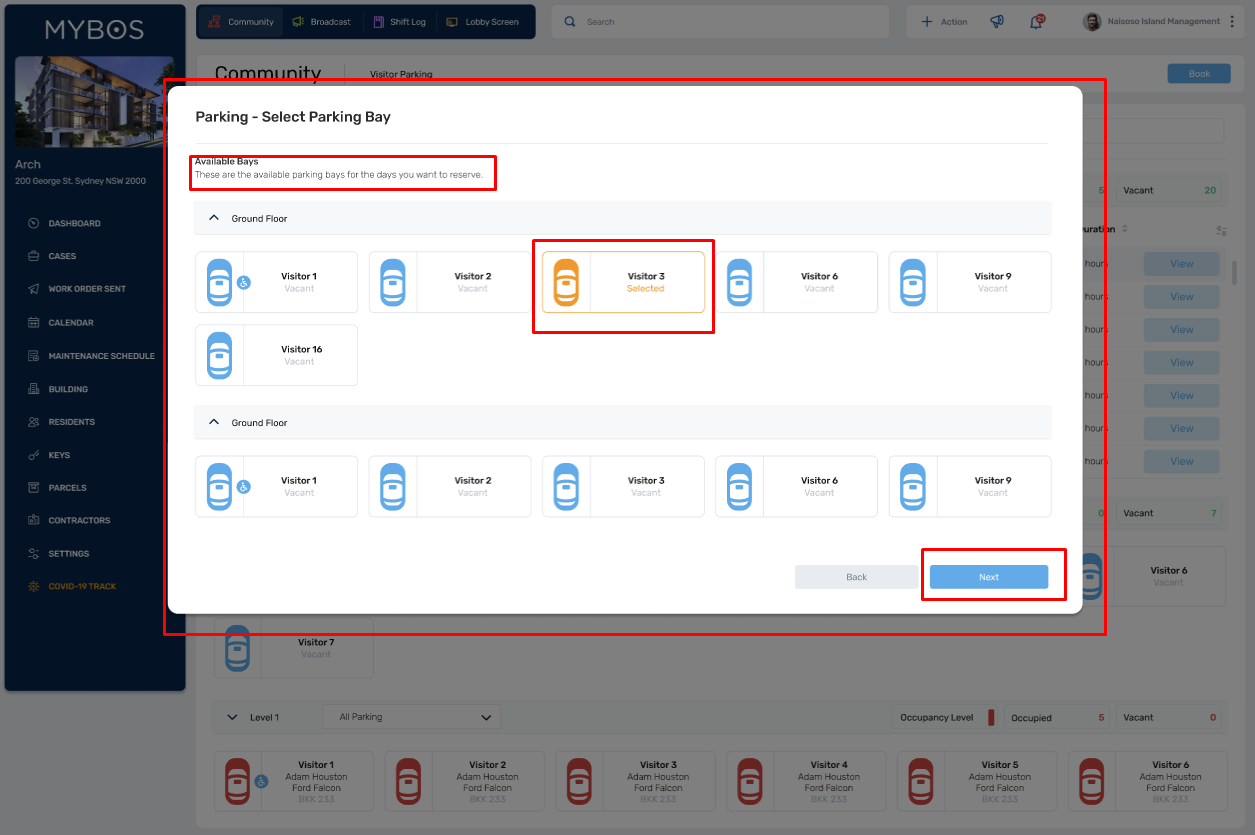
- View the available bays and select the bay you would like to book.
- Select Next
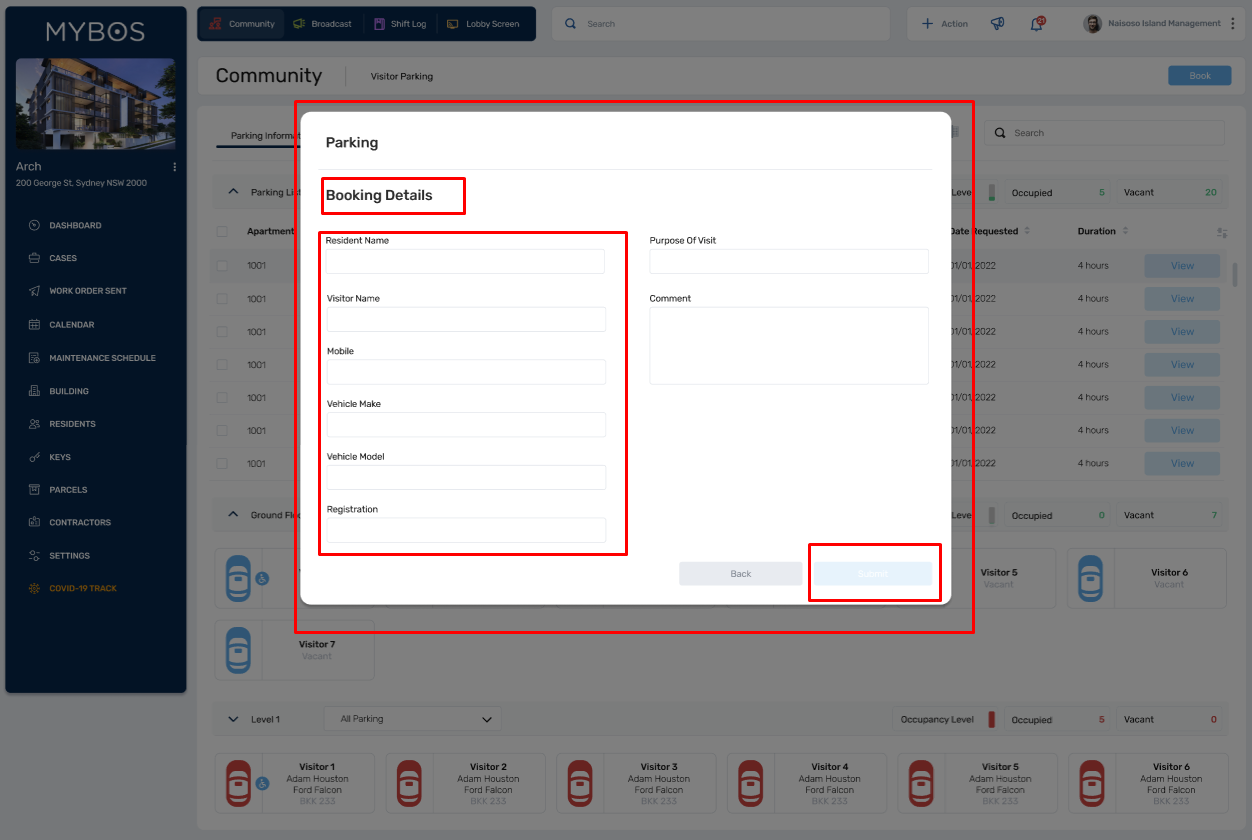
- Enter the All Booking Details
- Note all fields are mandatory except for Purpose of Visit and Comment
- Select save to save the booking.
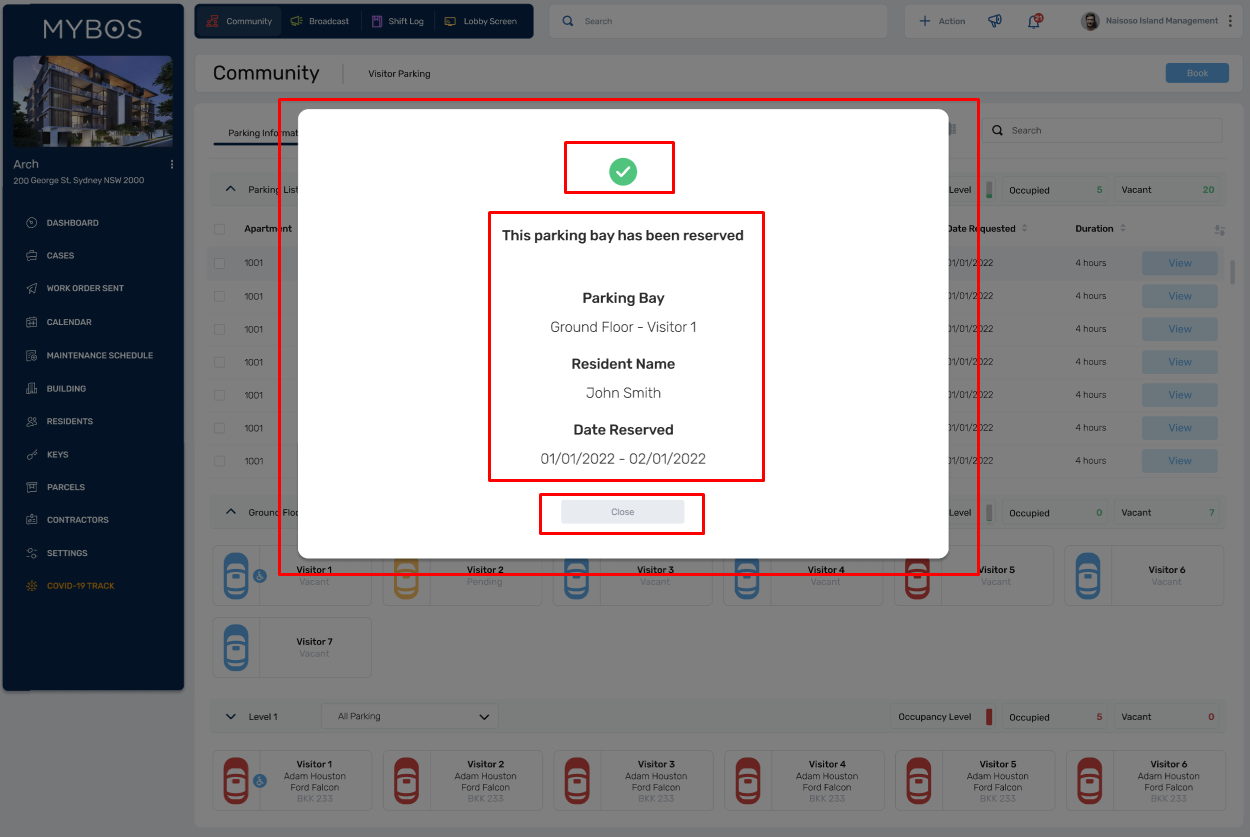
- Once saved, a notification pop up will appear conforming the booking is reserved
- You can close the popup
- An email notification will be sent to the resident to pass onto their visitor
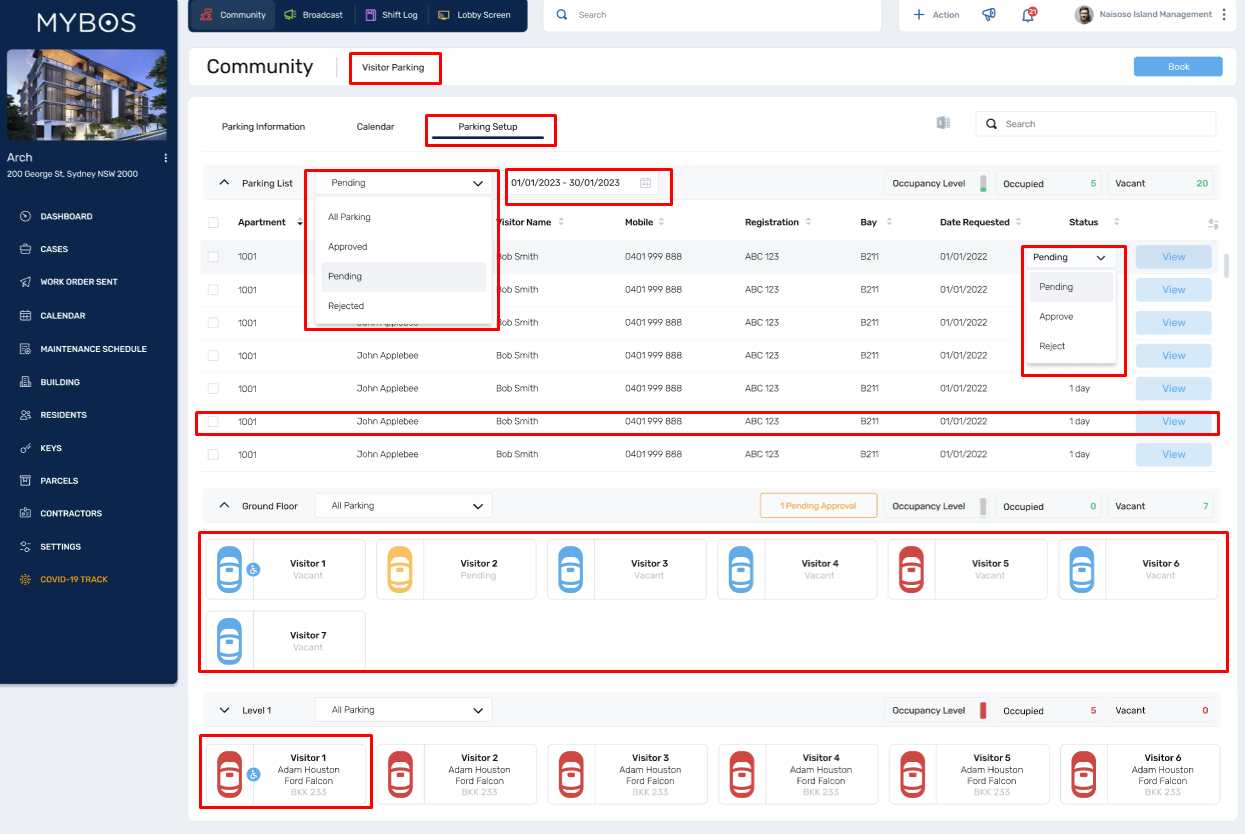
- Select Calendar and you will be able to see any Rejected, Pending and Approved parking bookings
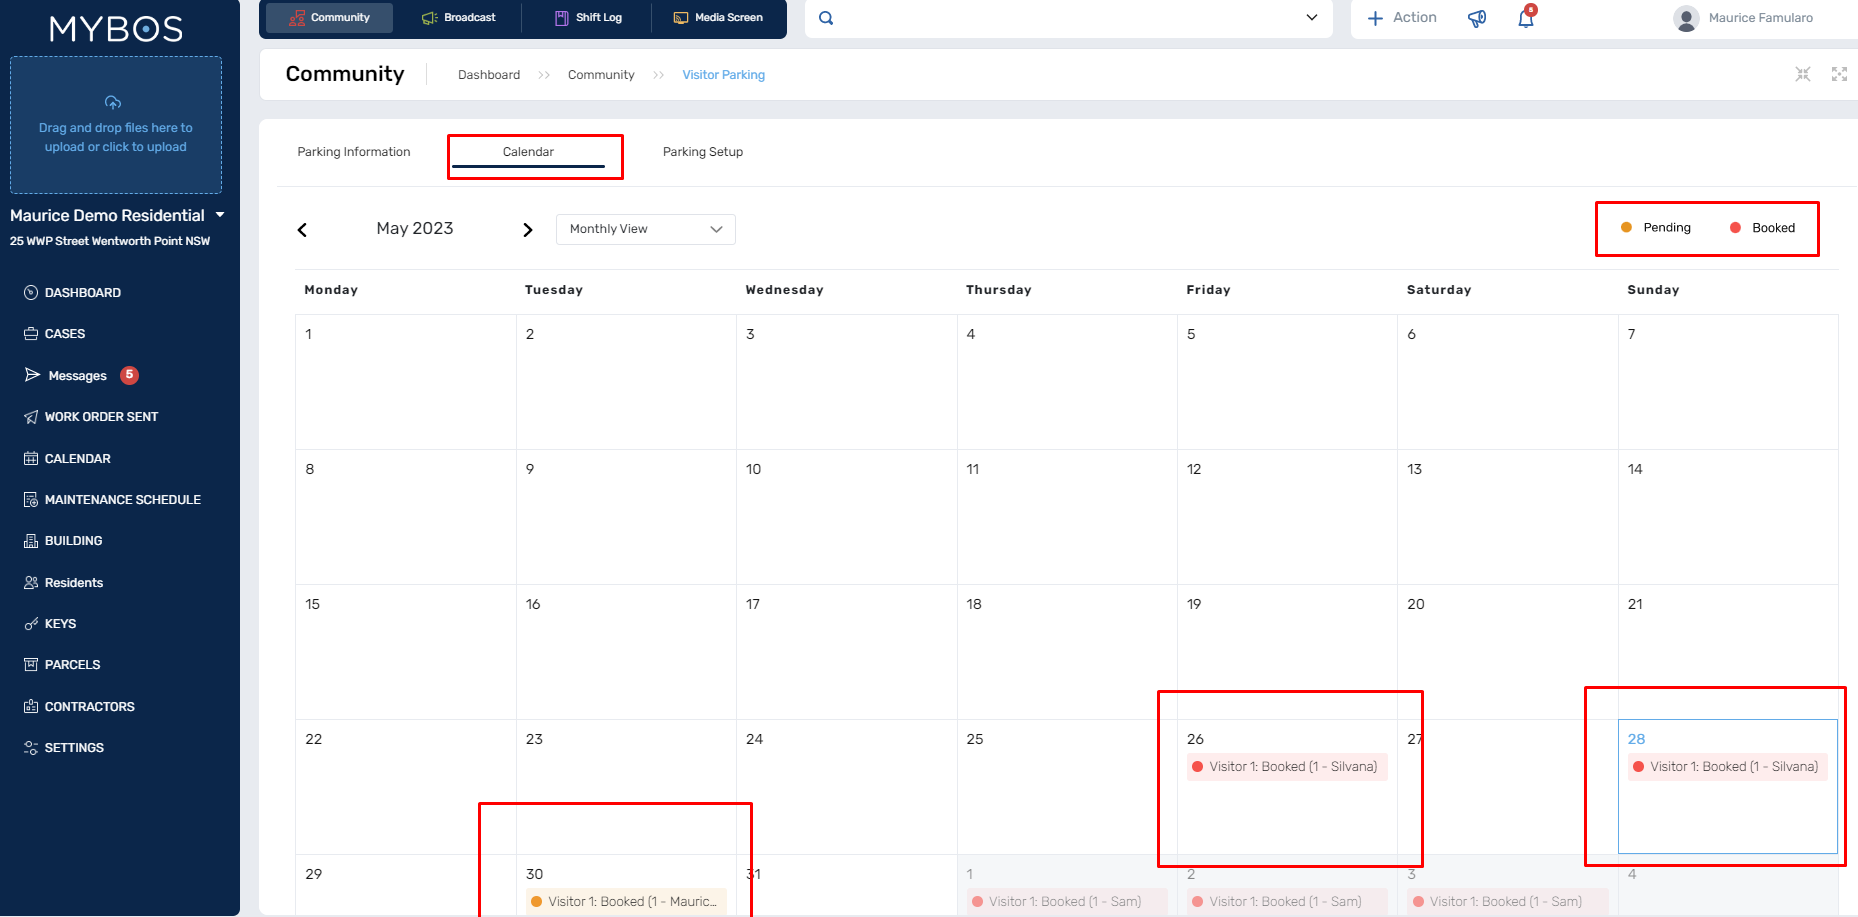
- Selecting Parking setup will also display a Parking List and you will be able to view the list as All Parking, Approved, Pending and Rejected
- Be sure you are viewing the correct date range.
- You will also be able to action the requests and Approve or Reject the bookings made by residents.
- Don't forget that if building management is making a booking on behalf of a resident's guest, the booking is automatically approved.
- You will also be able to visually see the status of each parking bay and guest details.