Company Portal - New
- Company Portal Dashboard
- Users
- Building
- Contractors
- Security
- Billing
- Logo
1. Company Portal Dashboard
To access the Company Portal Dashboard you need to have admin rights to access the Company Portal. Not all users have access as most are setup as standard users. Contact your manager.
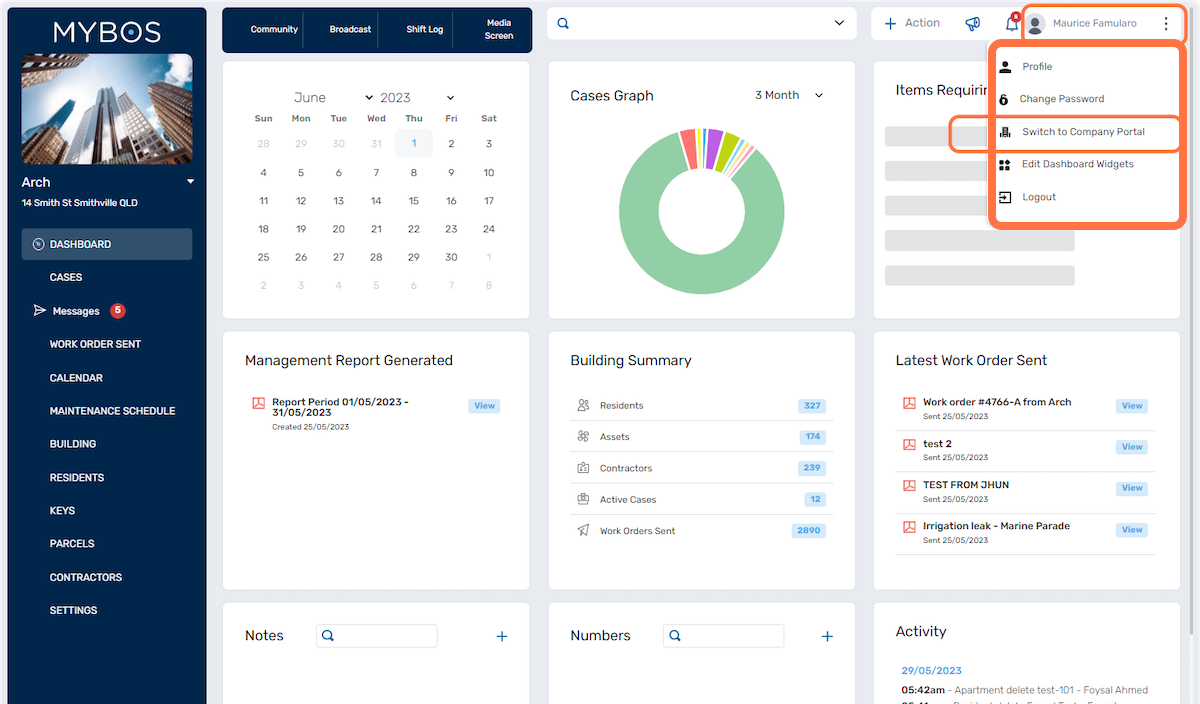
- From your building dashboard, select your displayed name on the top right-hand side of the screen.
- Select Switch to Company Portal from the pull-down menu.
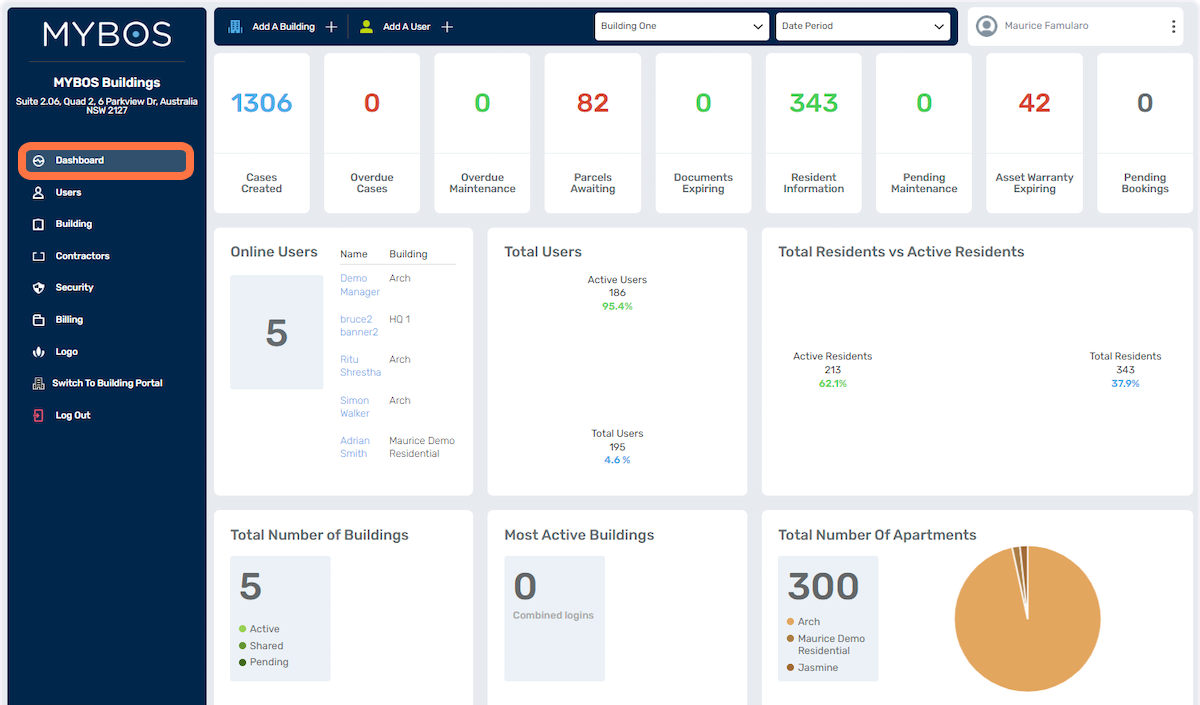
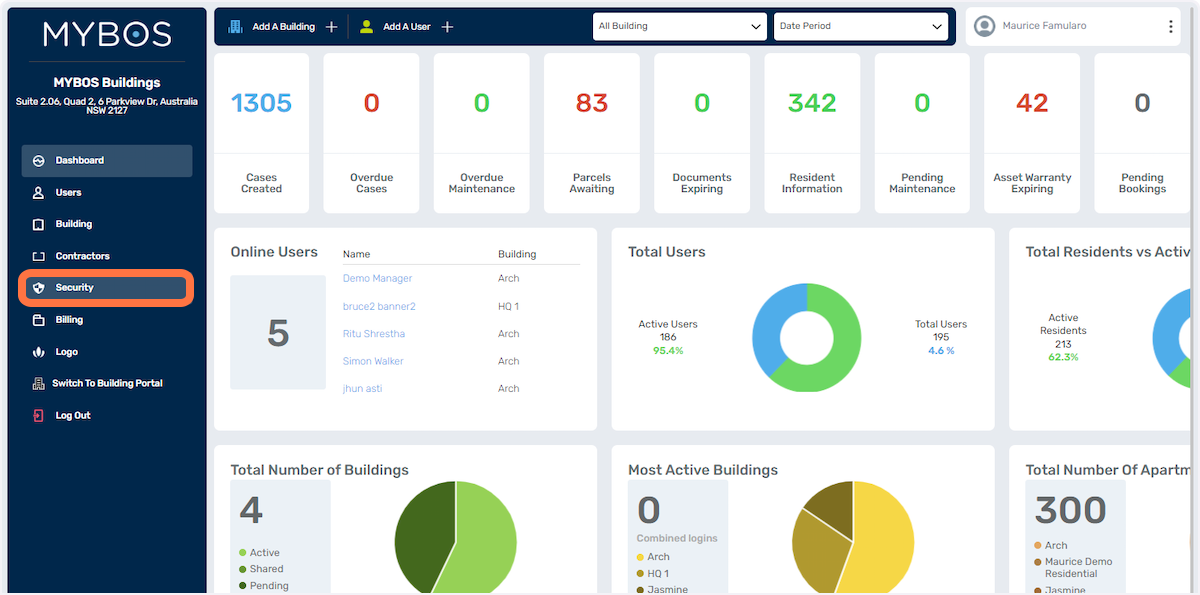
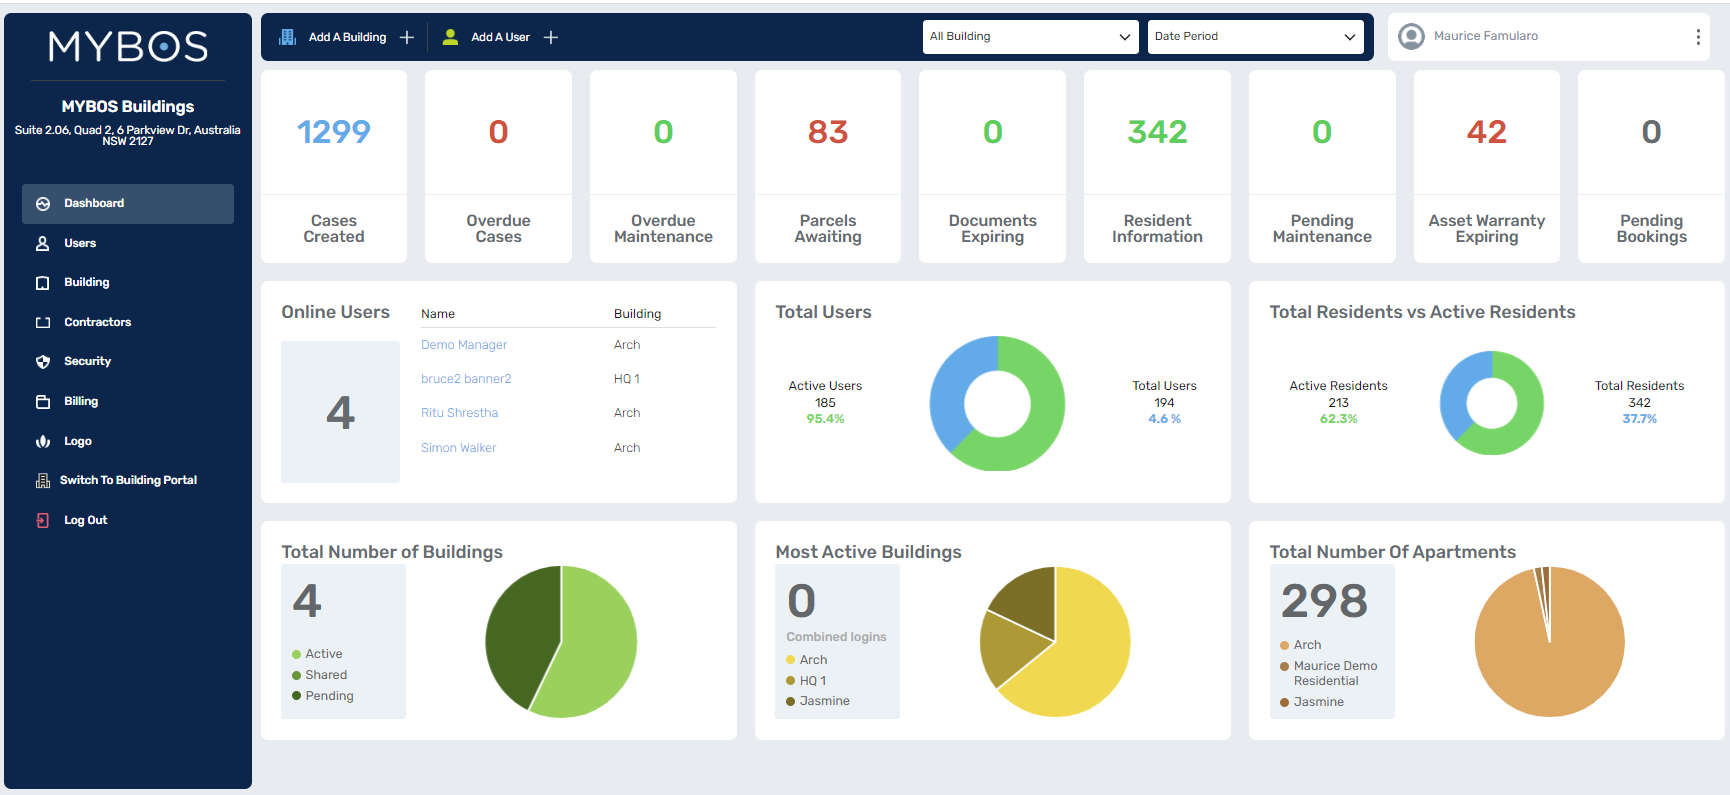
Below is the Company Portal
- Cases Created - Number of cases created across all your buildings.
- Overdue Cases - All overdue cases across all your buildings.
- Overdue Maintenance - Overdue Maintenance Schedules across all your buildings.
- Parcels Awaiting - Total parcels waiting to be collected.
- Documents Expiring - All documents such as contractor insurances and other documents with expiry dates.
- Resident Information - Total number of registered residents.
- Pending Maintenance - Total number of maintenance requests that are pending action.
- Asset Warranty Expiring - Total number of assets that have expired warranty.
- Pending Bookings - all amenity bookings that have not yet been approved by the building manager
- Online Users - Currently logged in building managers.
- Total Users - Users that have logged in (active Users)
- Total Residents vs Active Residents - Residents that have logged in (Active Residents)
- Total Number of Buildings - The number of buildings in your portfolio
- Most Active Buildings - Based on staff logins
- Total Number Of Apartments - total number of apartments in your managed portfolio
2. Users
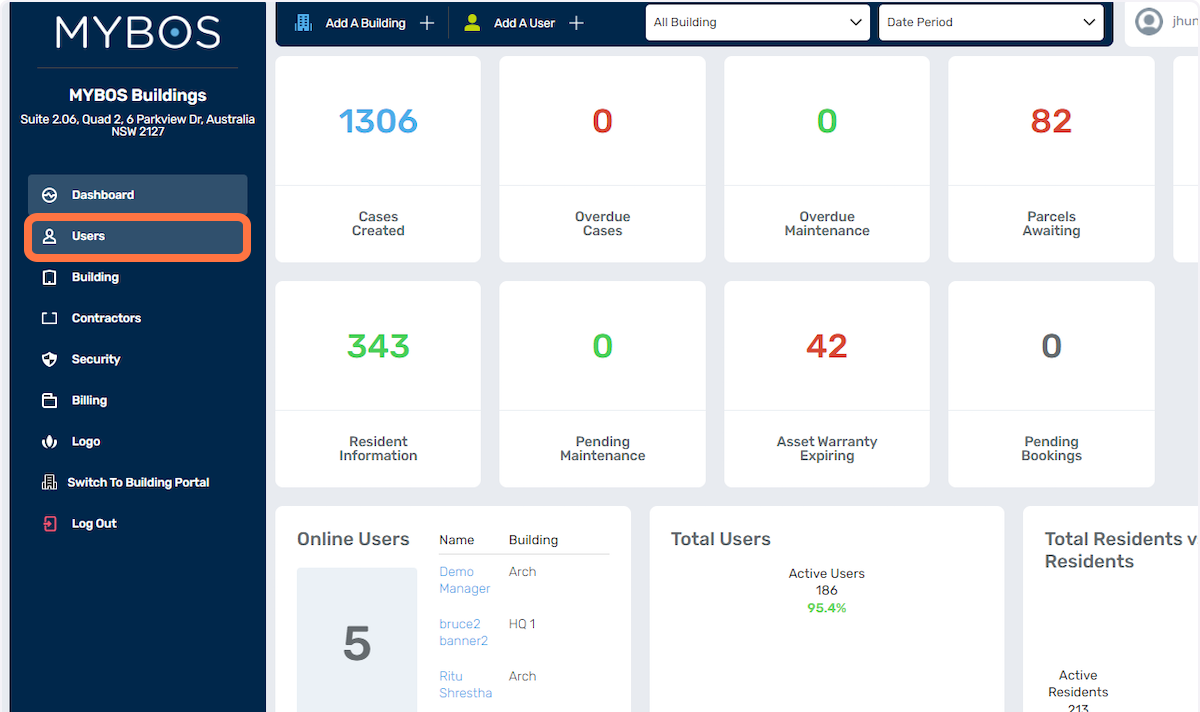
- To start, click on the Users button in the left-hand menu
- You can filter the entries to be displayed through the filter options below
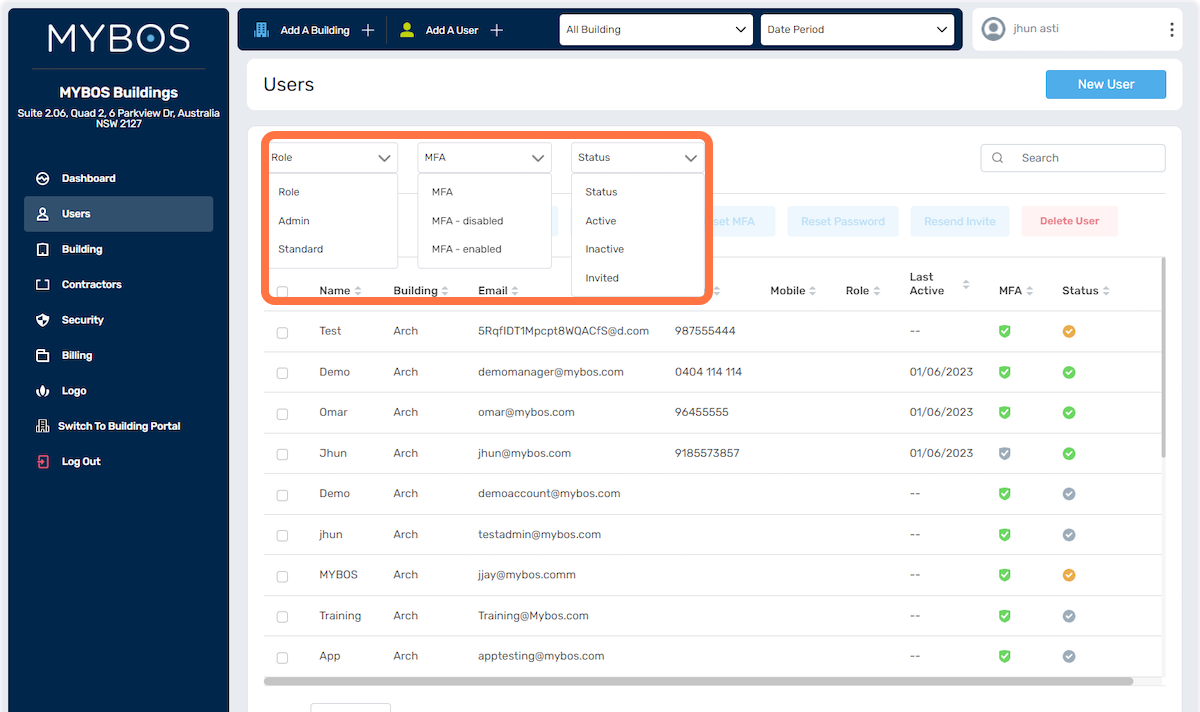
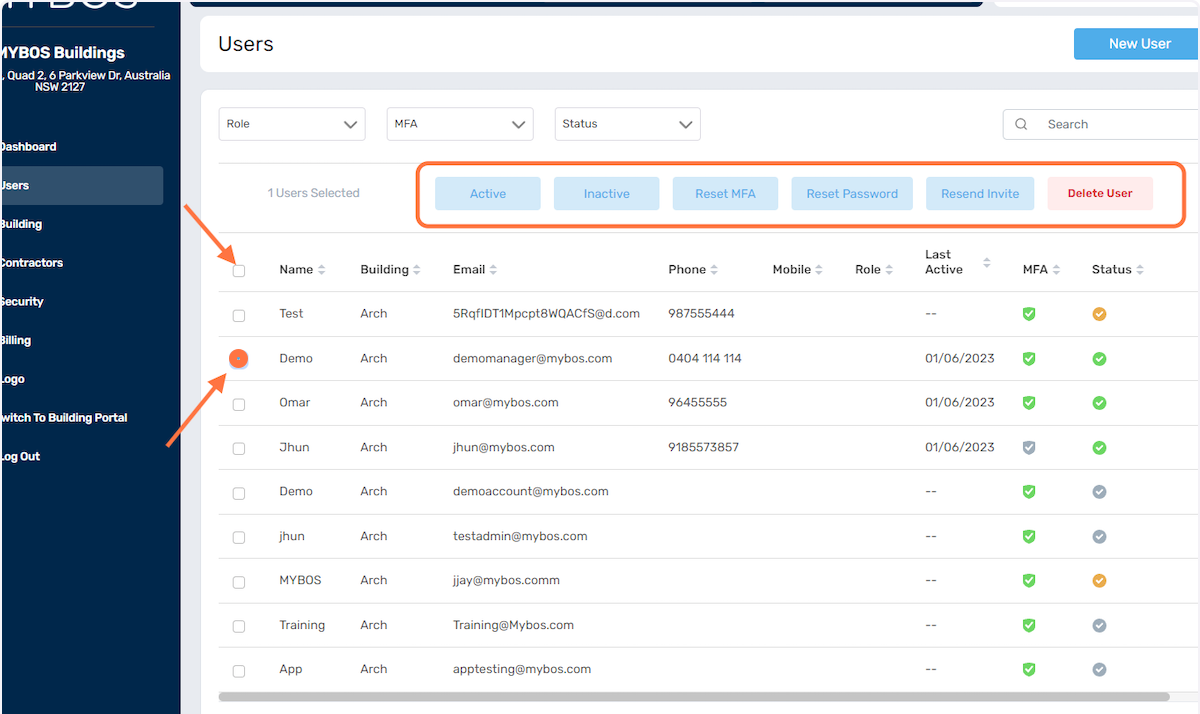
- To modify user settings, you can simply select one or multiple users by checking the corresponding checkboxes provided below. At the top, you will find buttons that allow you to apply the desired changes to the selected user(s).
Creating a New User
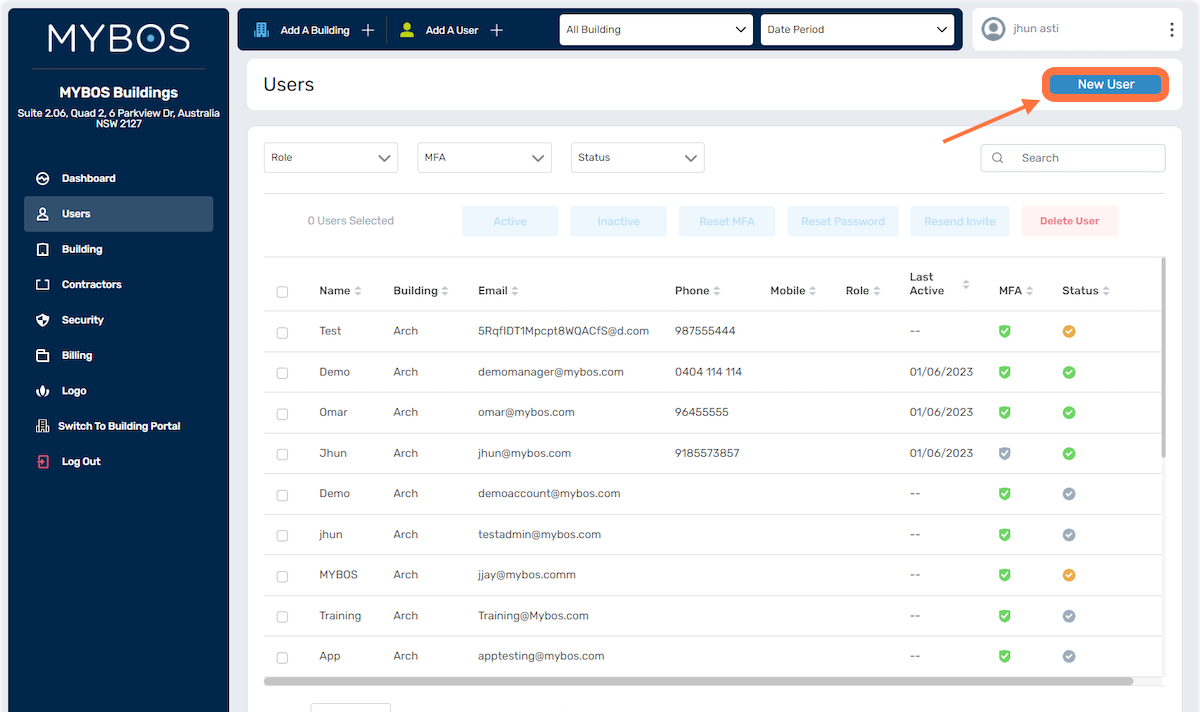
- To create a New User, click on the button on the top right corner below
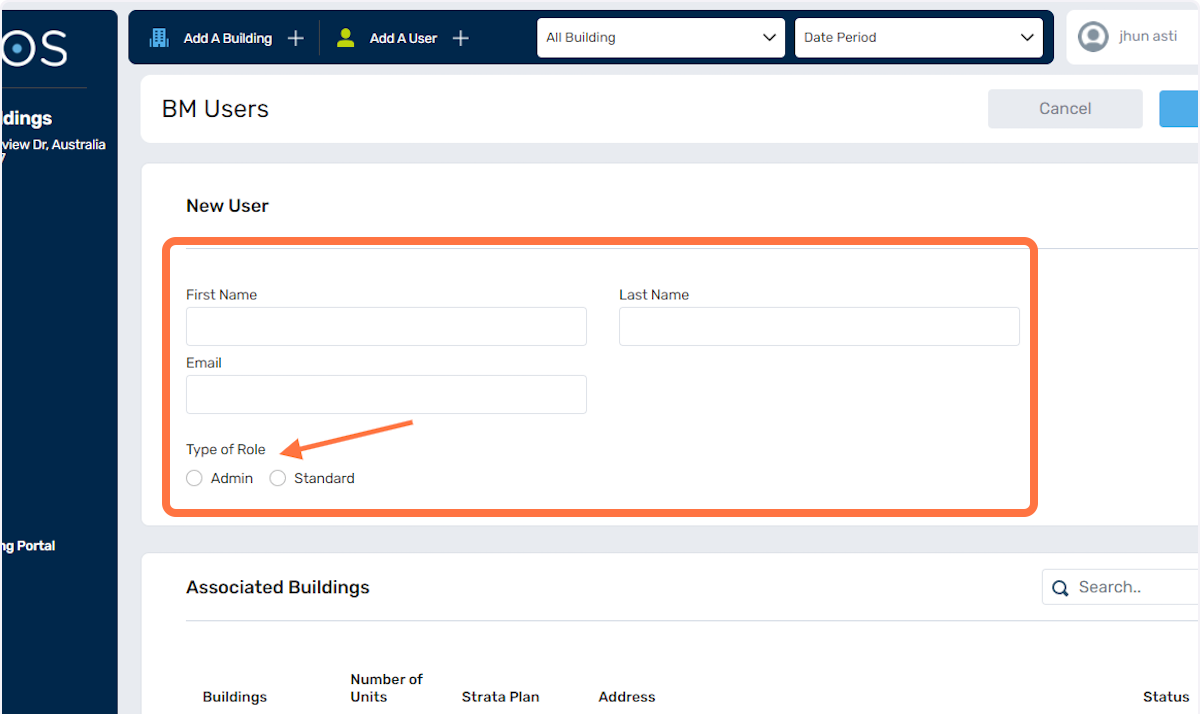
- Complete the required details and select the type of role.
- Admin - this will allow the user to switch and view the company portal.
- Standard - this will limit the user to view the building managers portal only.
- Next, you can assign which buildings will be added to this user's access below:
- Click on the tick boxes to include the building into the user's access.
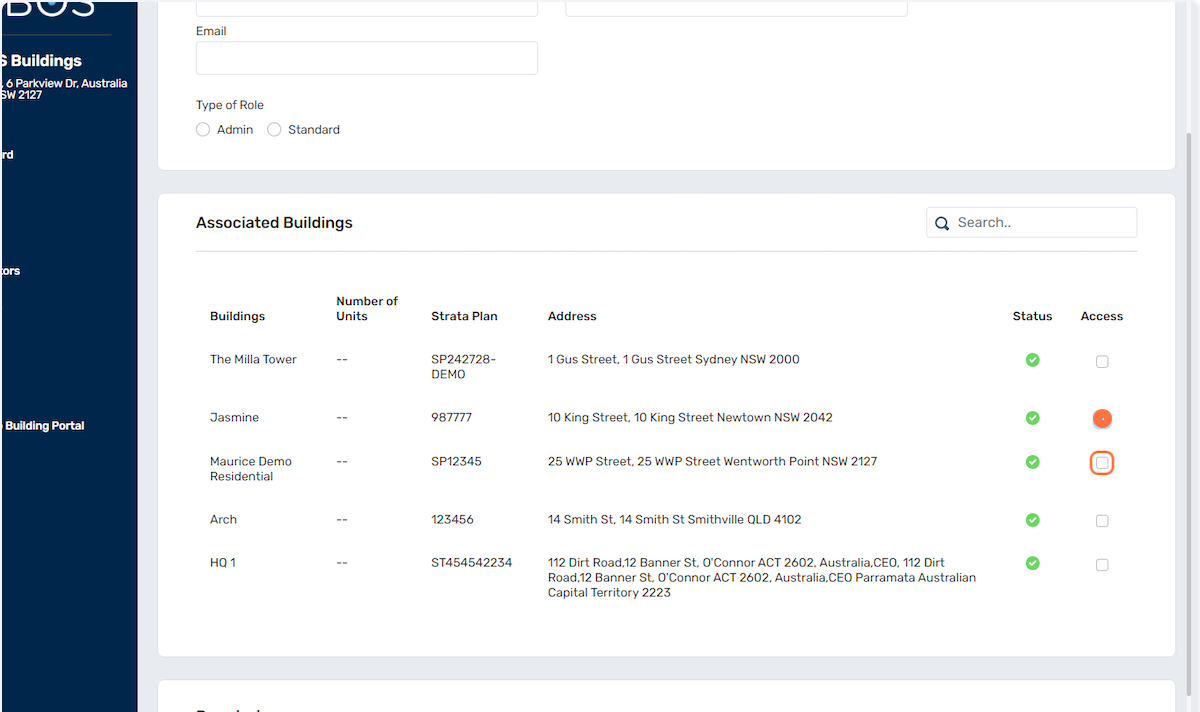
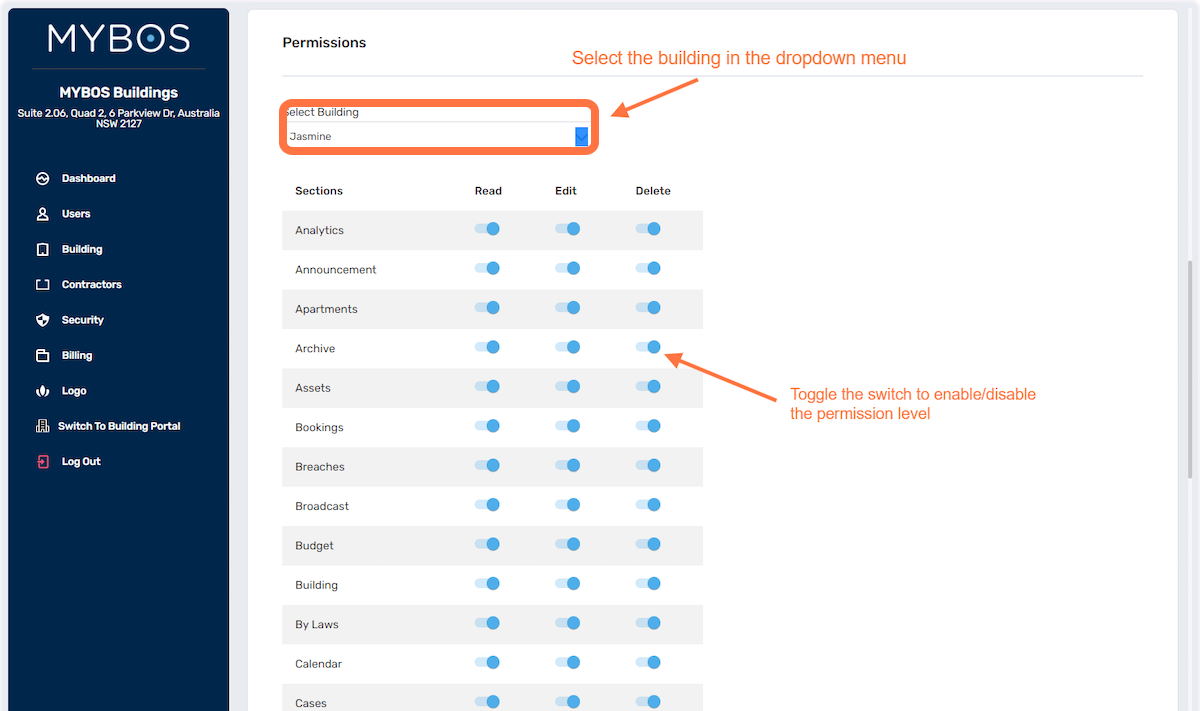
- You can set the Permission levels in the section shown below.
- You have the options to limit the user for READ, EDIT and DELETE access level.
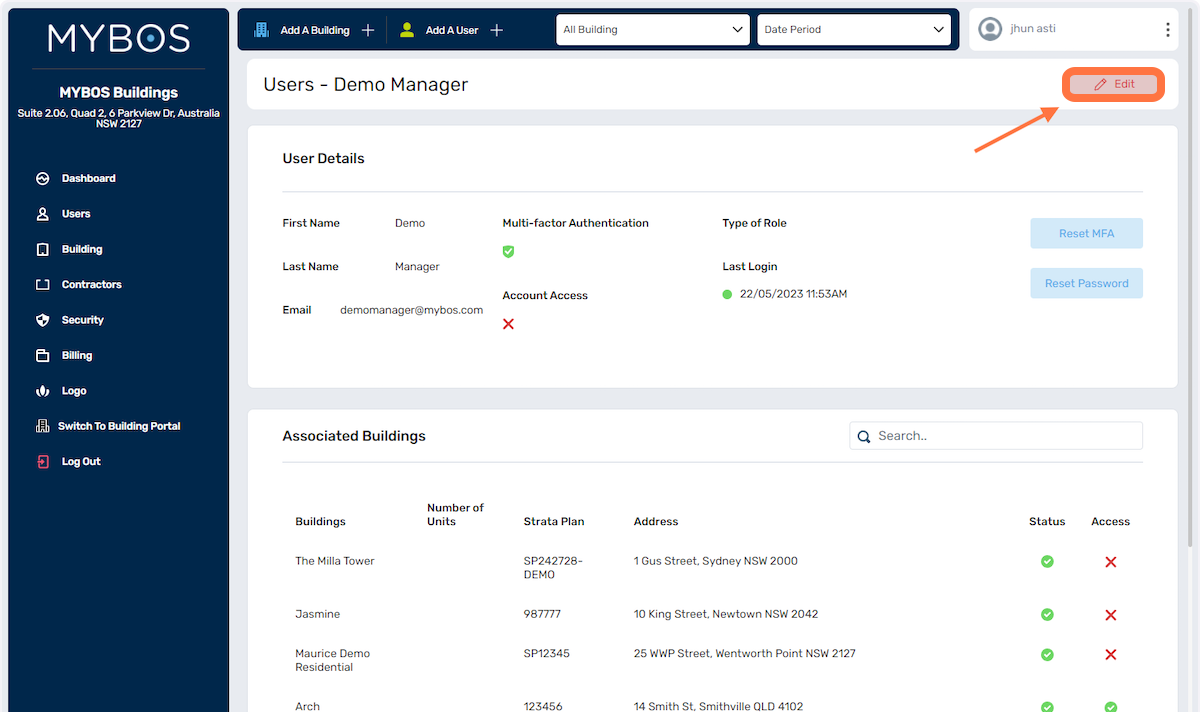
- To modify the settings of existing users, you can access their individual profiles and make adjustments using the Edit button. When you open a specific user's profile, locate the Edit button and click on it. This will allow you to update and customize the user's settings according to your requirements.
3. Building
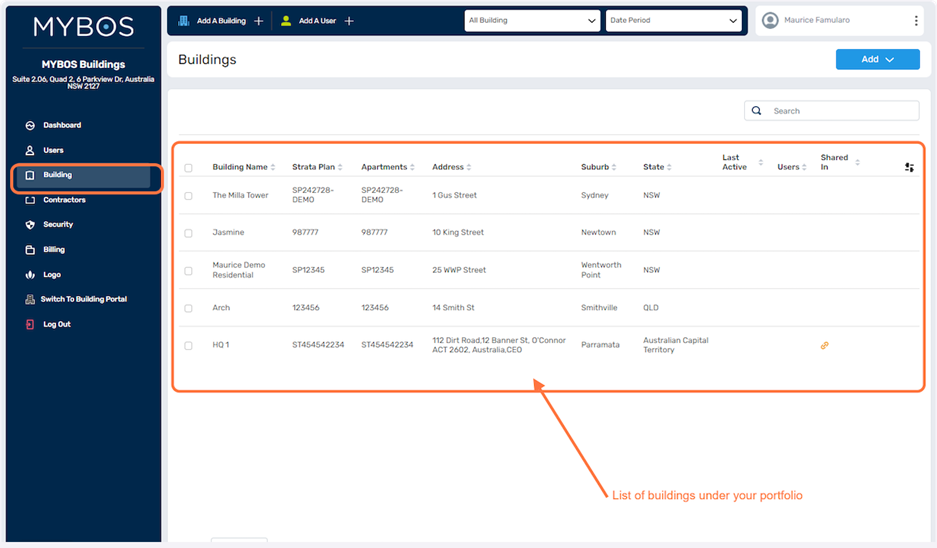
- View Portfolio: You can view a comprehensive list of
your buildings under your management.
- Share Access: One of the notable features is the
ability to share access to your buildings with other companies and their users.
For instance, if the Owners Corporation or Body Corporate owns the account,
they can grant access to a Building Manager (BM) or Facility Management (FM)
company.
Overall, this section provides a centralized platform to
oversee your building portfolio, add new properties, and facilitate secure
access sharing with other companies and their users.
- View your Portfolio.
- Share a Building.
- Accept a Shared Building from another company.
View your Portfolio:
- Select Building to view portfolio from the
Company Portal left-hand menu.
Share A Building
- Select Building from the left-hand menu
- Select the building you wish to Share Access
- Click on the Share Access button

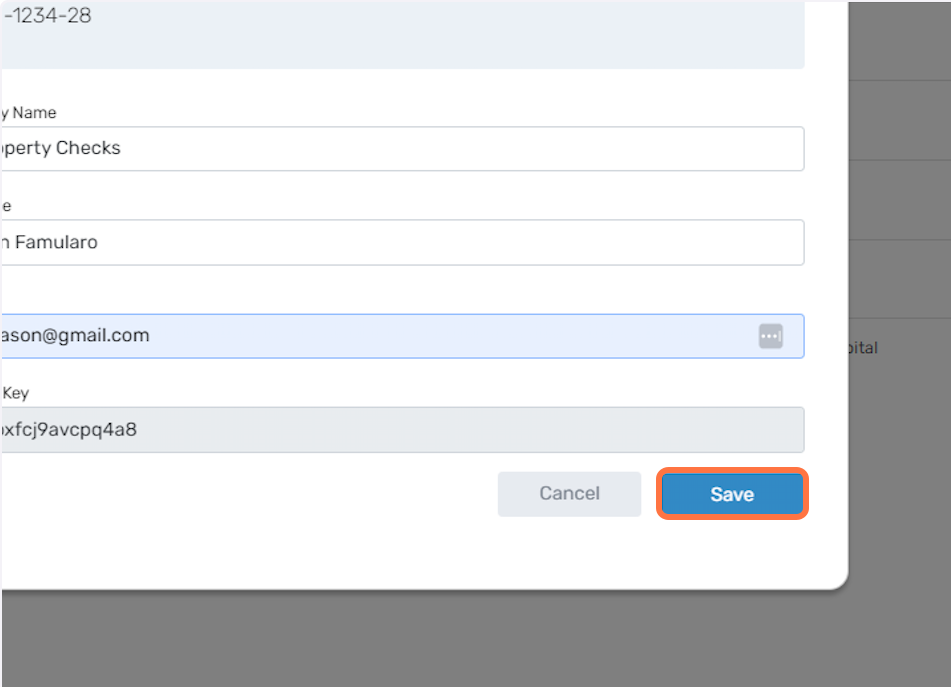
- Complete the pop up form.
- All fields are mandatory
- Note that a Building Key is randomly generated by the platform.
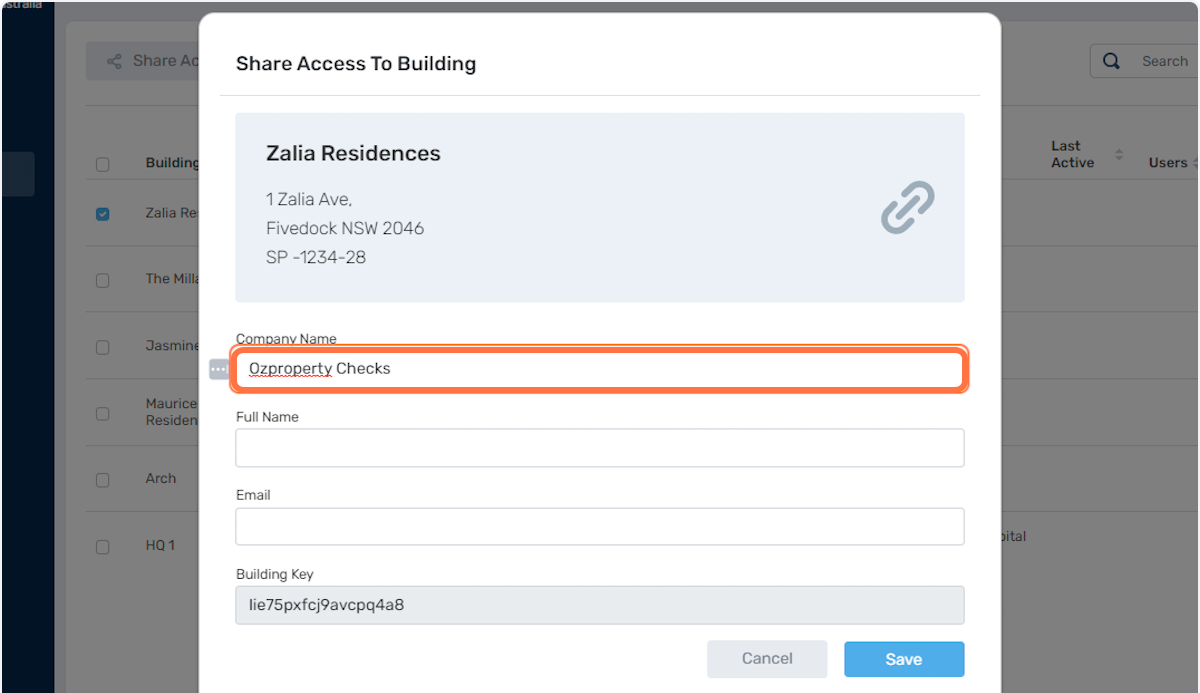
- Click to save and email
Using the Building Key
- To add a Shared Access Building click on Building from your Company Portal and Select Add
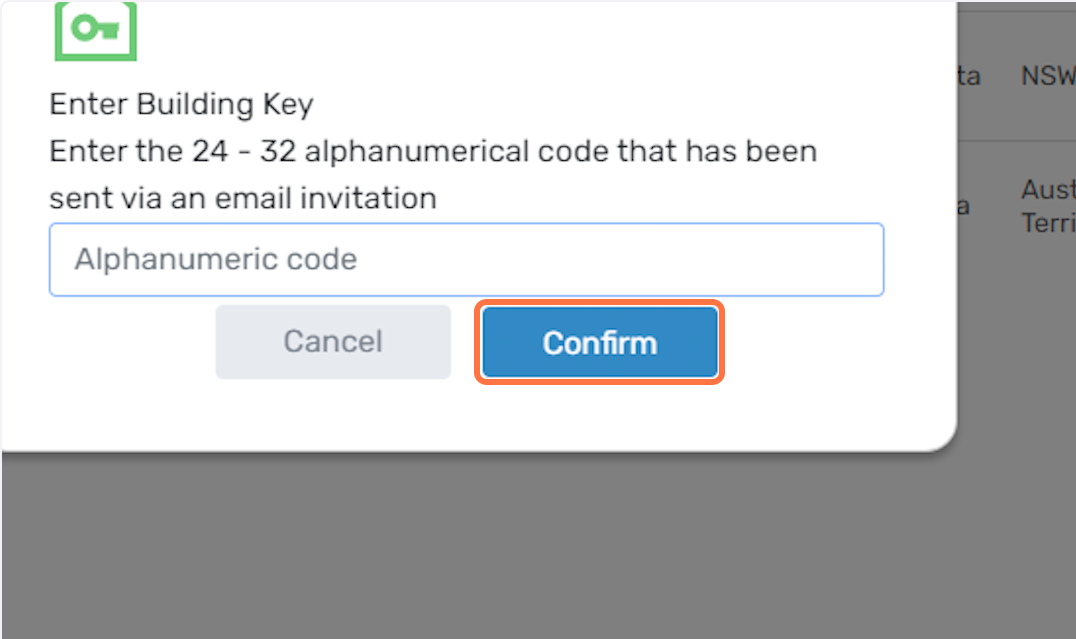
- Select Enter Building Key
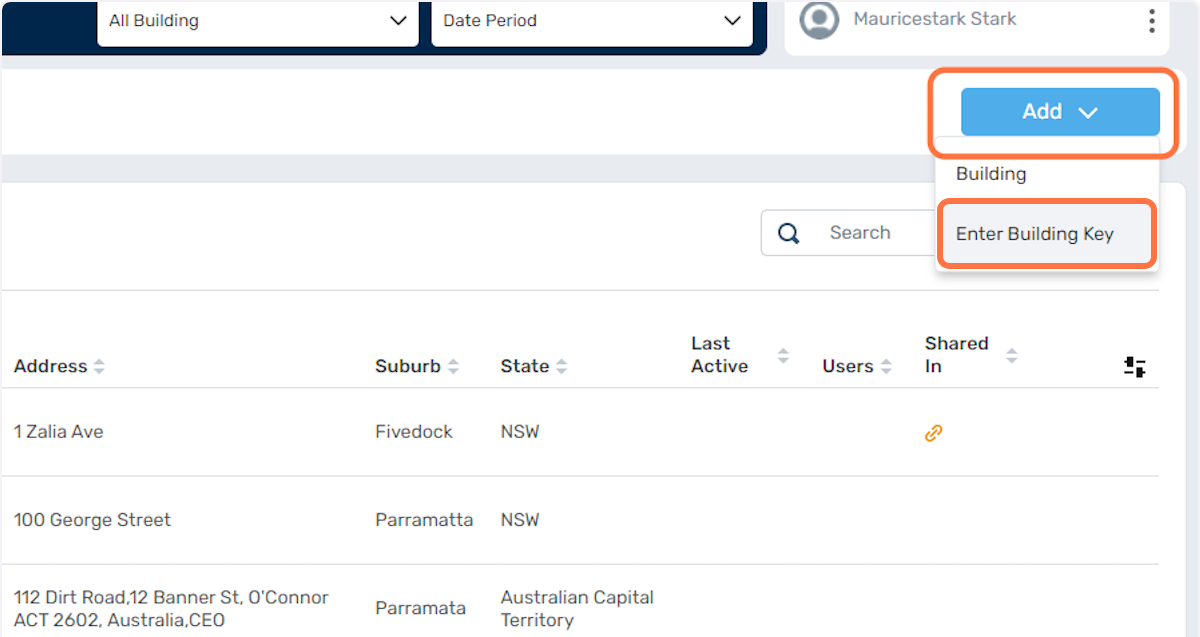
- Enter the Building Key code that has been sent via email.
- Click on Confirm
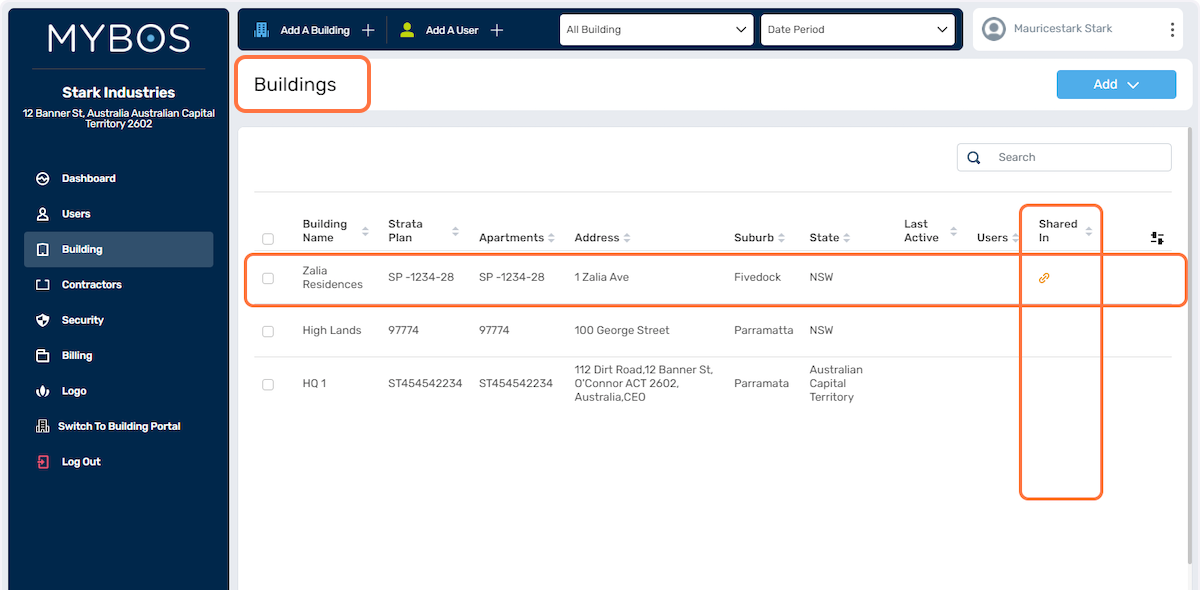
Your new building will appear on your building list- Note that under the Shared in Column, the shared icon will appear.
- Once you have access to the building, you will need to assign users.
- To do this follow the steps under the KB Article titled Users
- Assigned users will be able to switch buildings
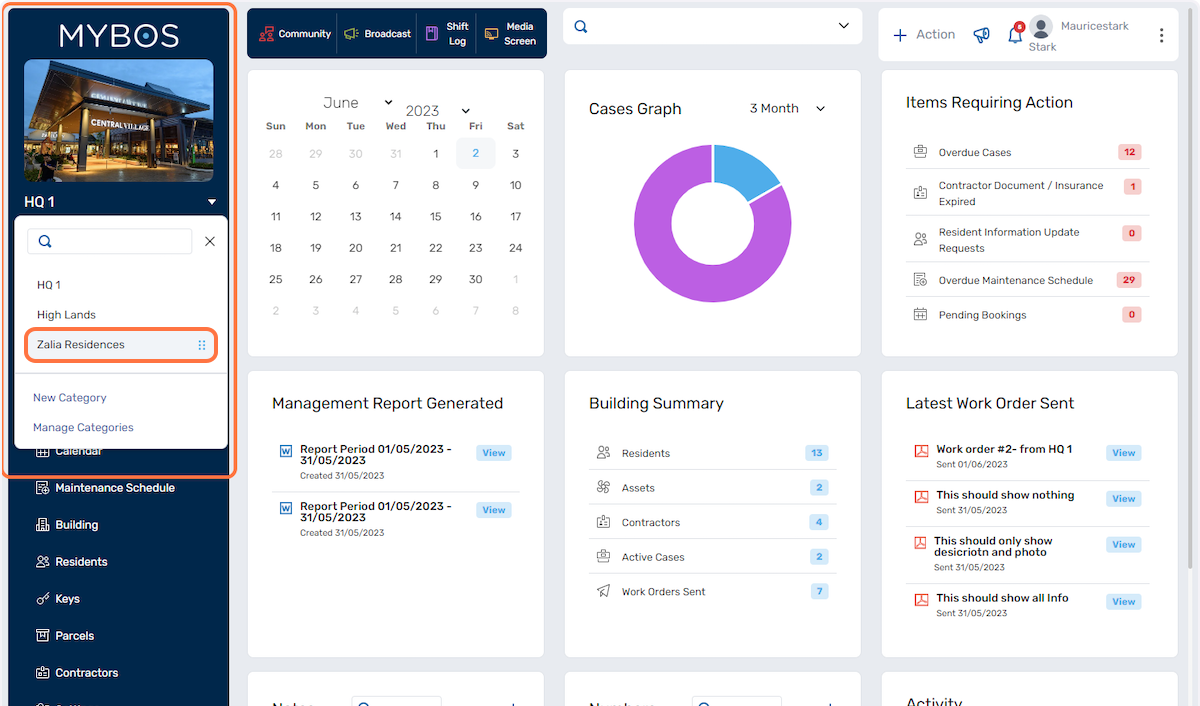
When you return to your Building Dashboard, You will be able to Select the shared building from the pulldown menu.

- Click on the down arrow highlighted to change buildings

- Select the building
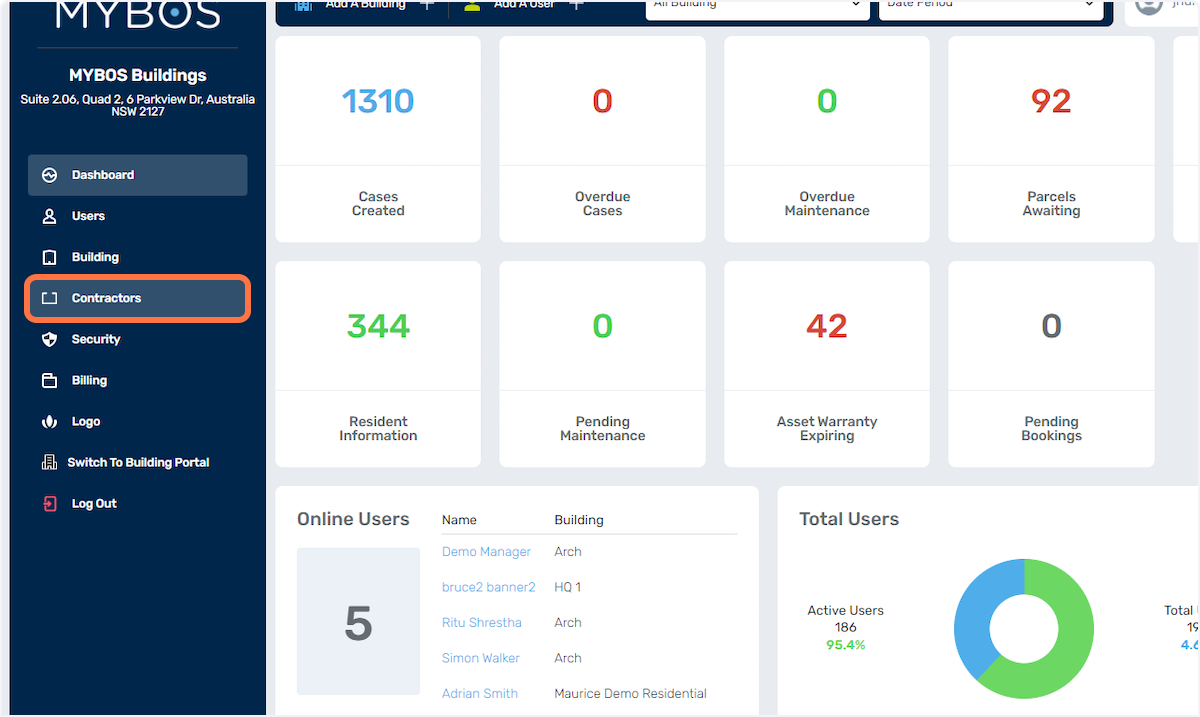
4. Contractors
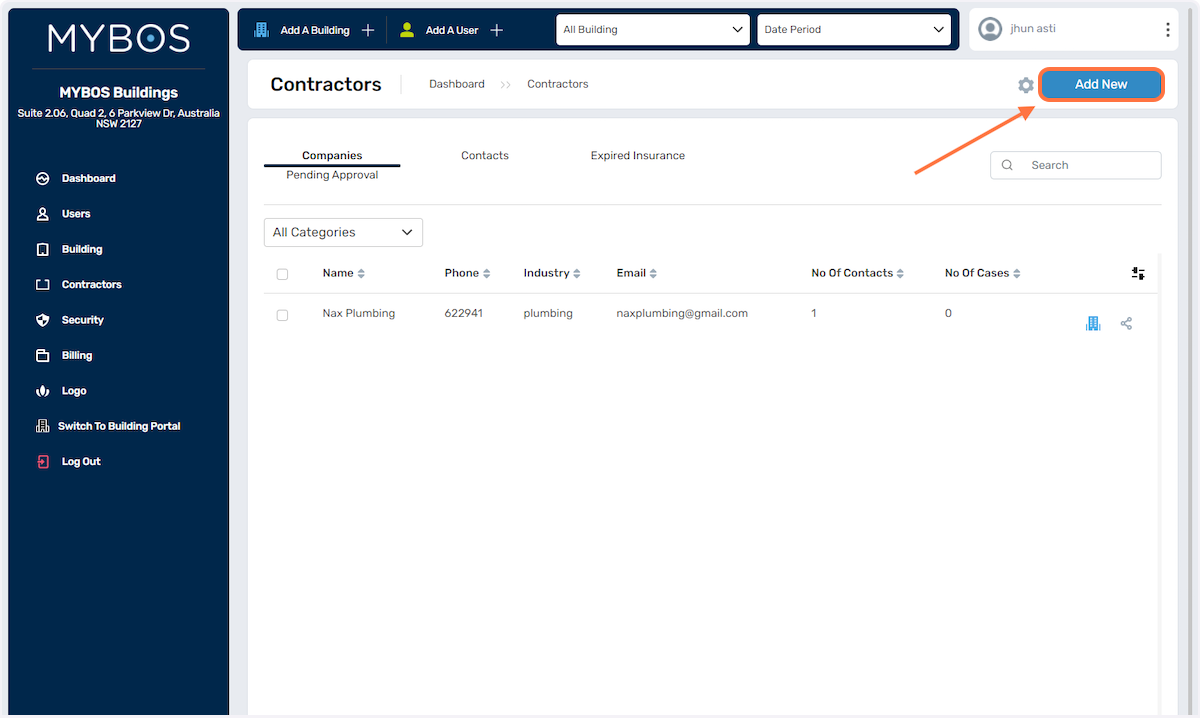
- To get started, click on the Contractors button on the left hand menu:
- To add a new Contractor, click on the Add New button:
- Fill in the contractor details in the field below:
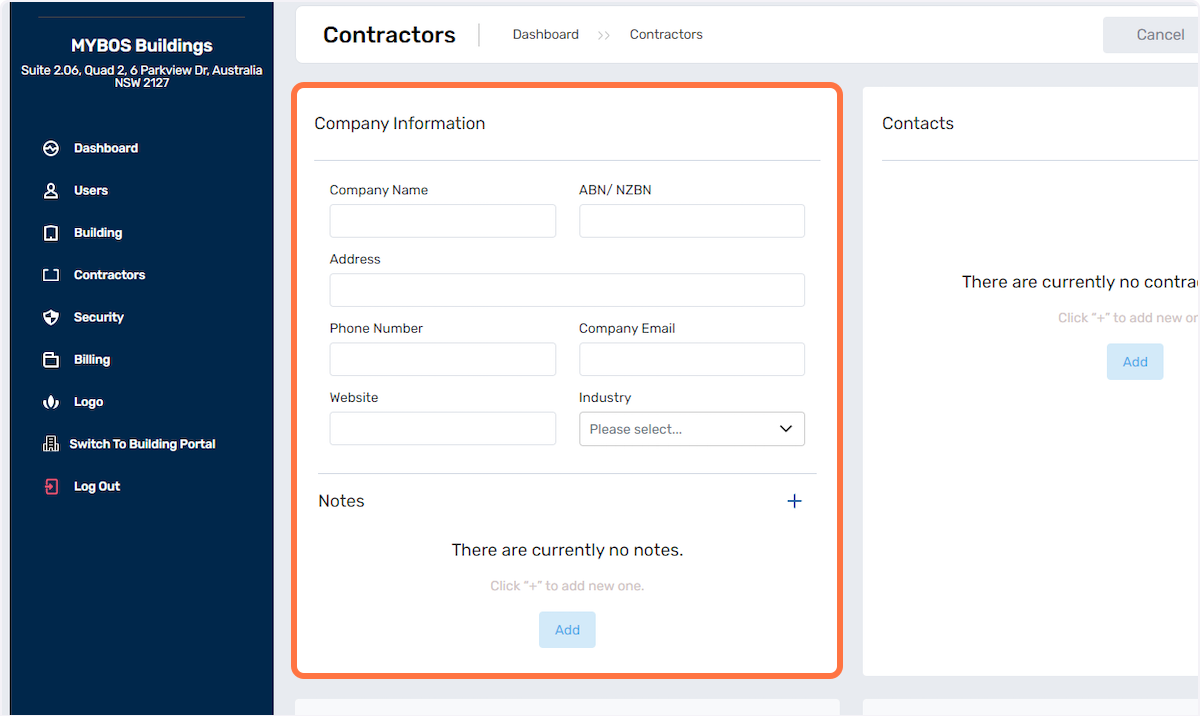
- You can also add multiple contacts and select a primary contact for the contractor through here:
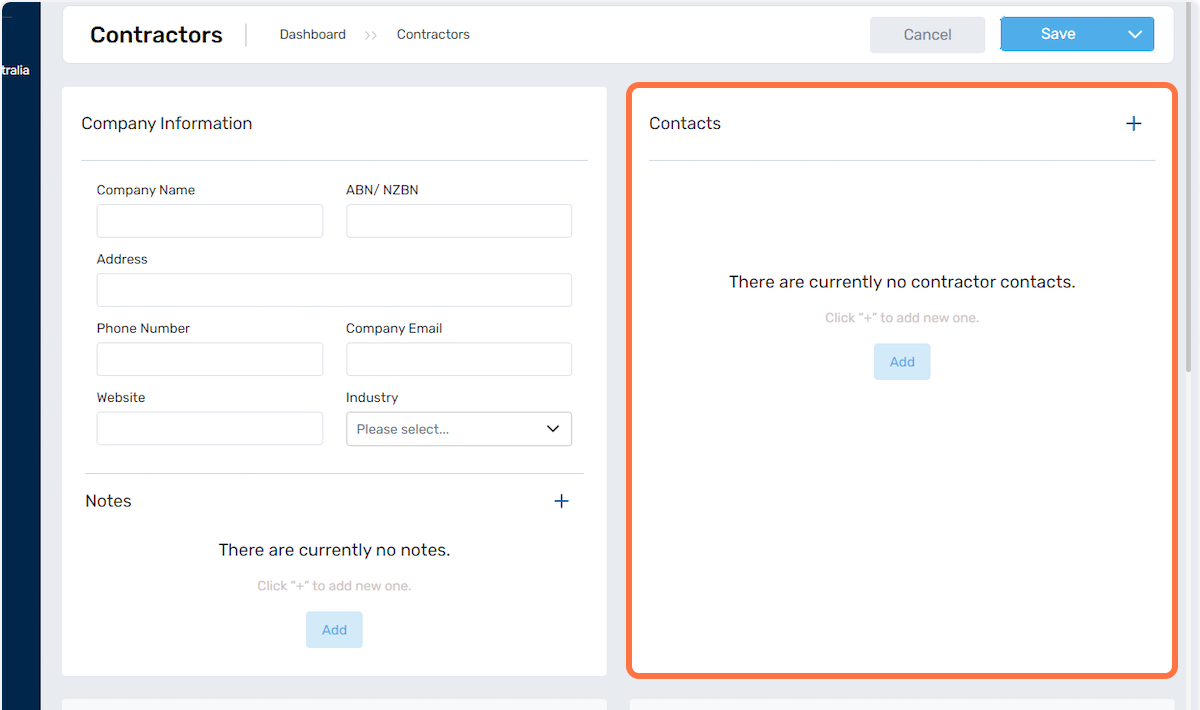
- You can upload documents and insurance files through the area below:

- Next is to assign which building(s) would you like to assign this contractor by clicking the Designate button below:

- If you want to assign it to all your buildings, click on the top most tick box to select all or you can choose specific buildings only by ticking their tick boxes as shown below:
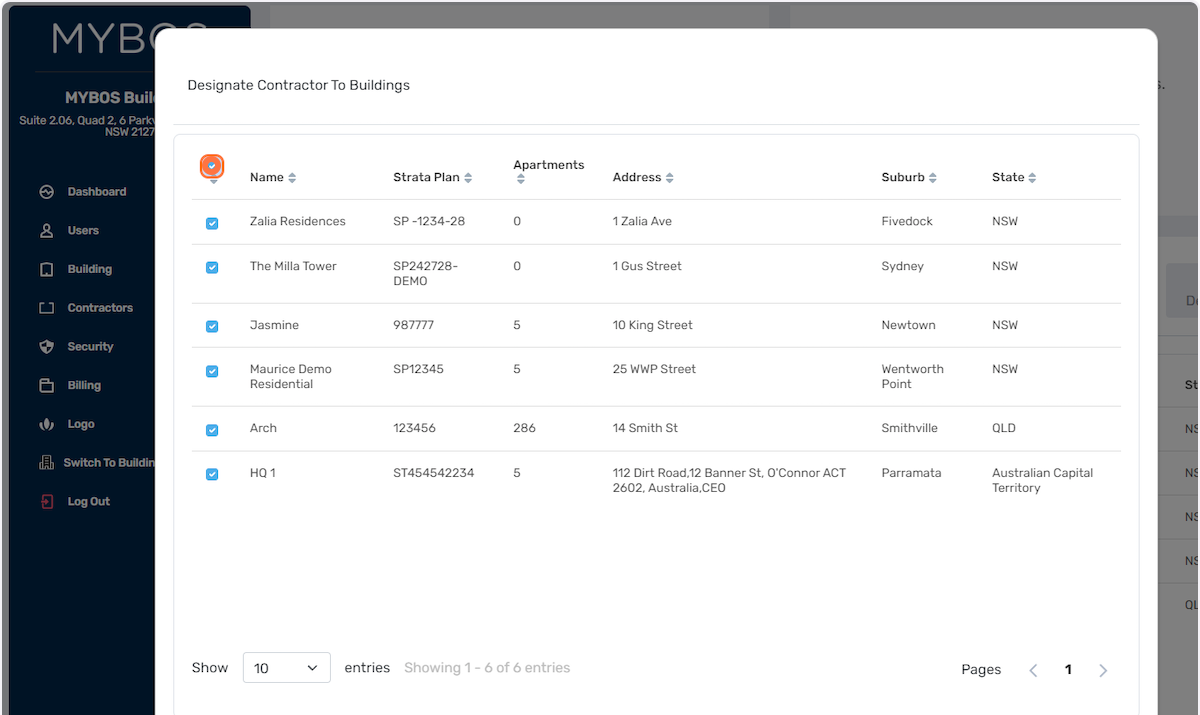
- Once the buildings are selected, click the Close button to close the pop up window:
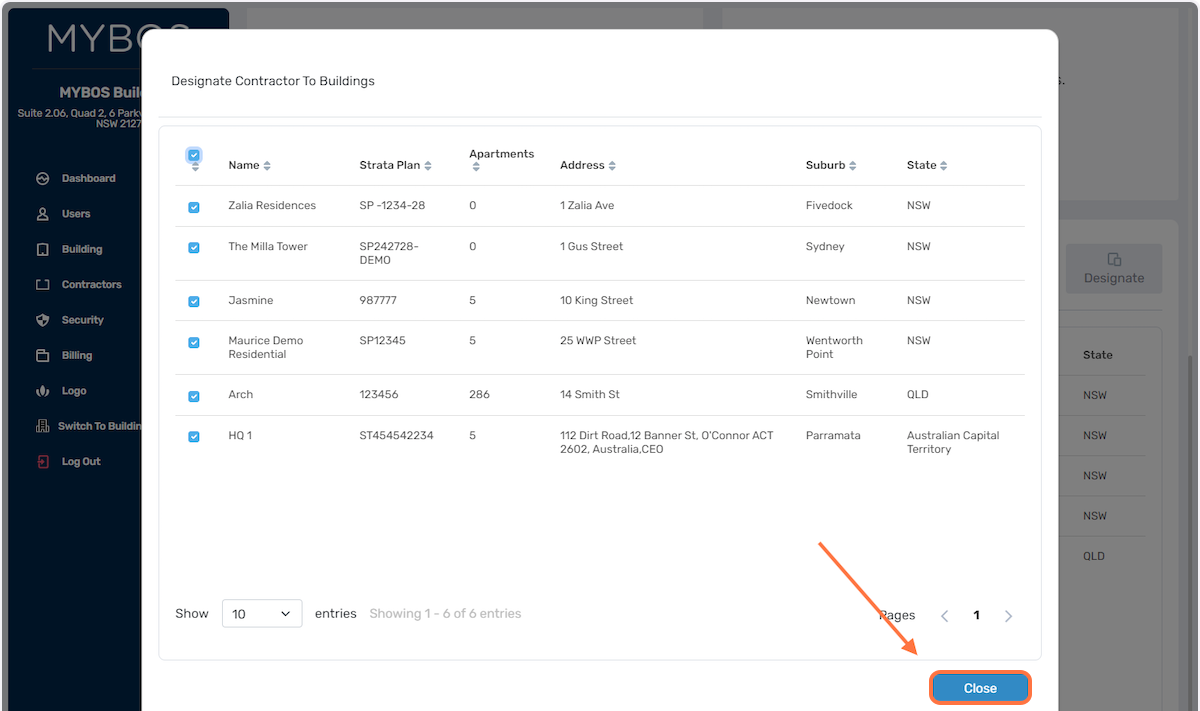
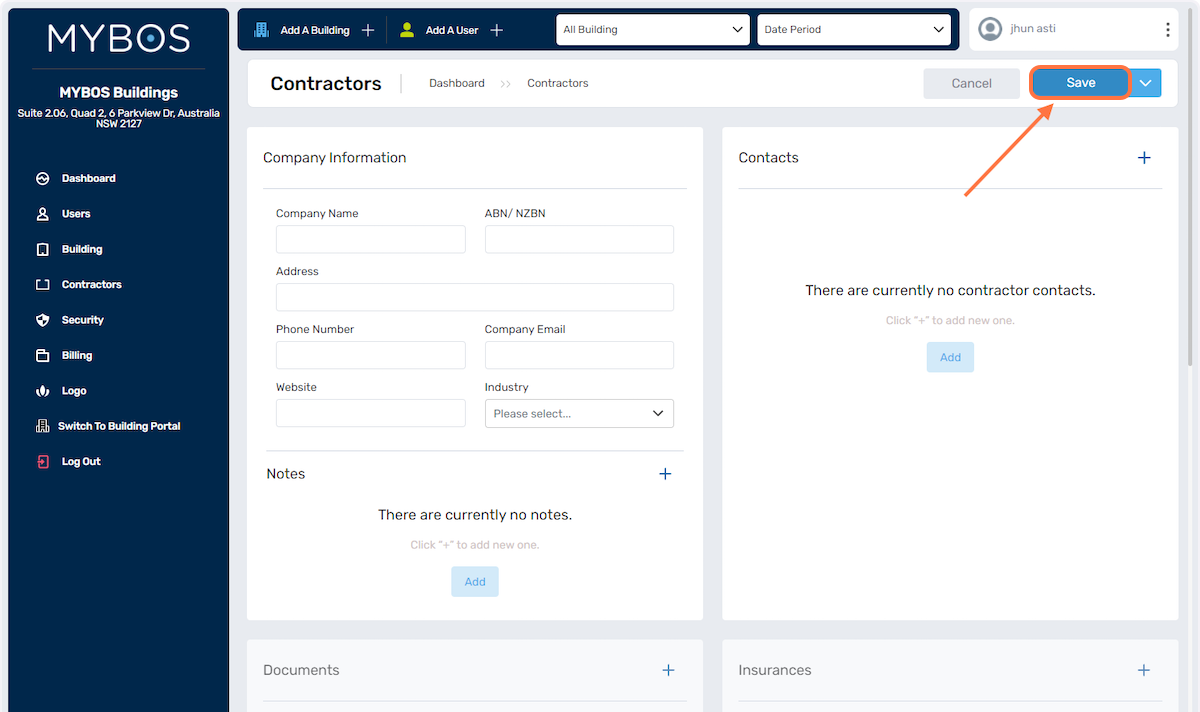
- Last step is to click the Save button to apply the changes.

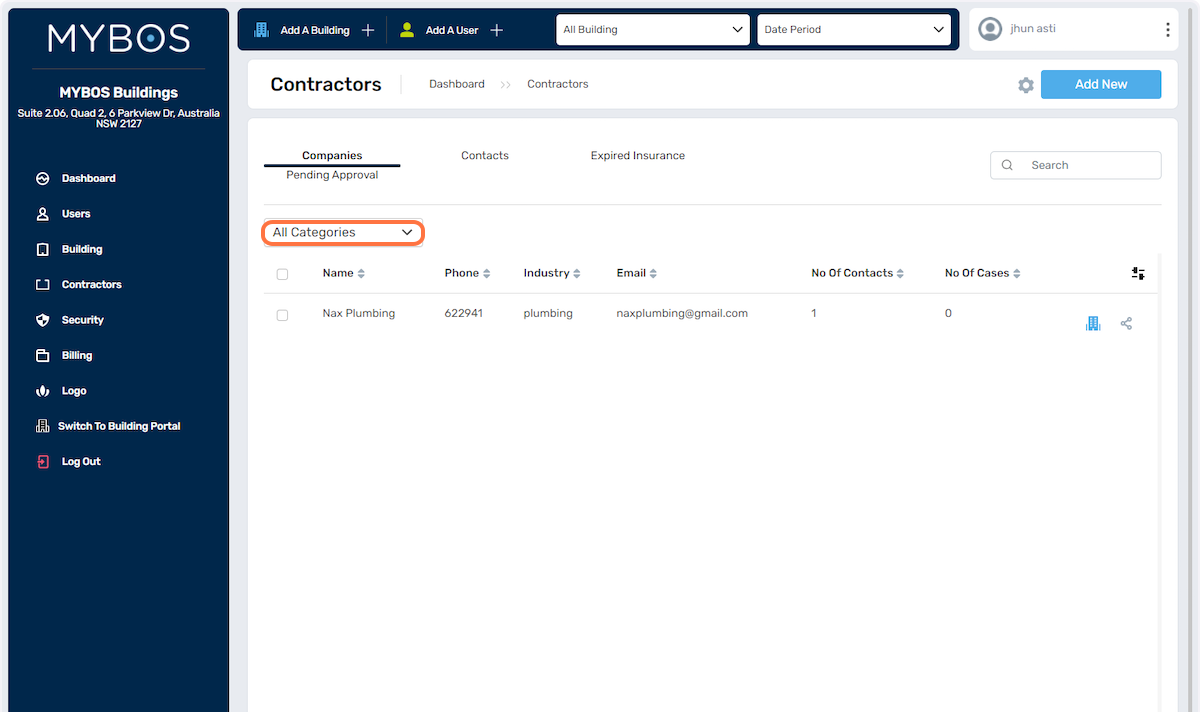
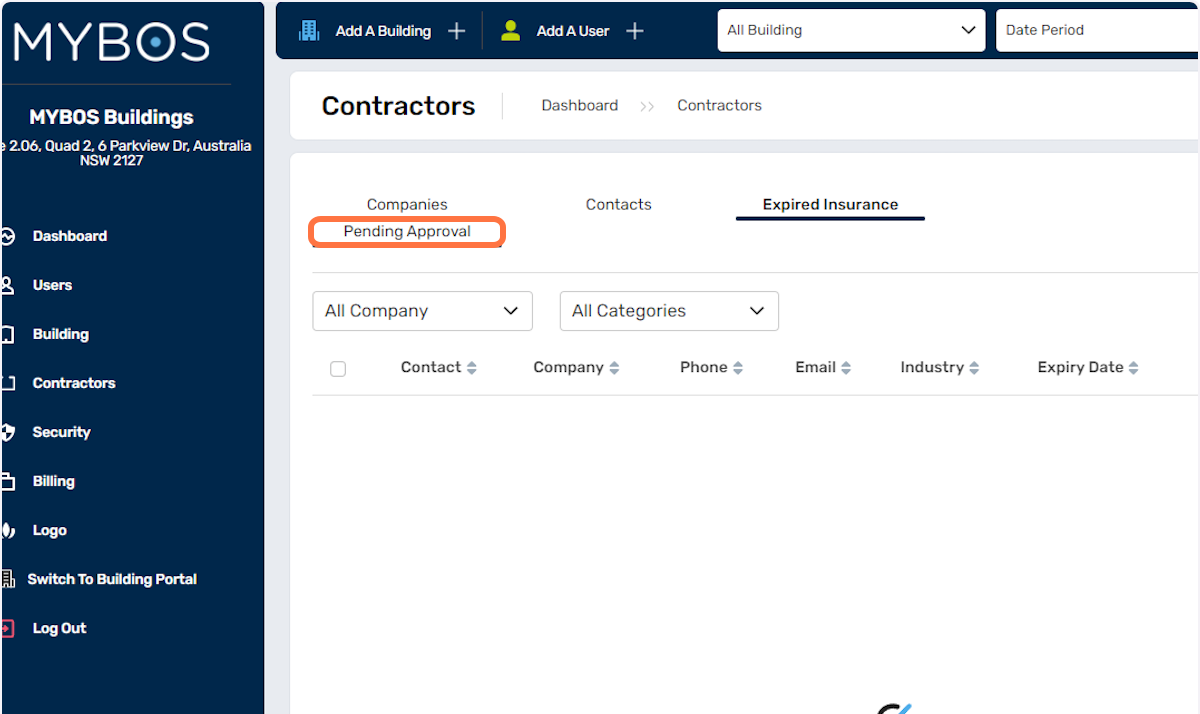
Contractor Filters:
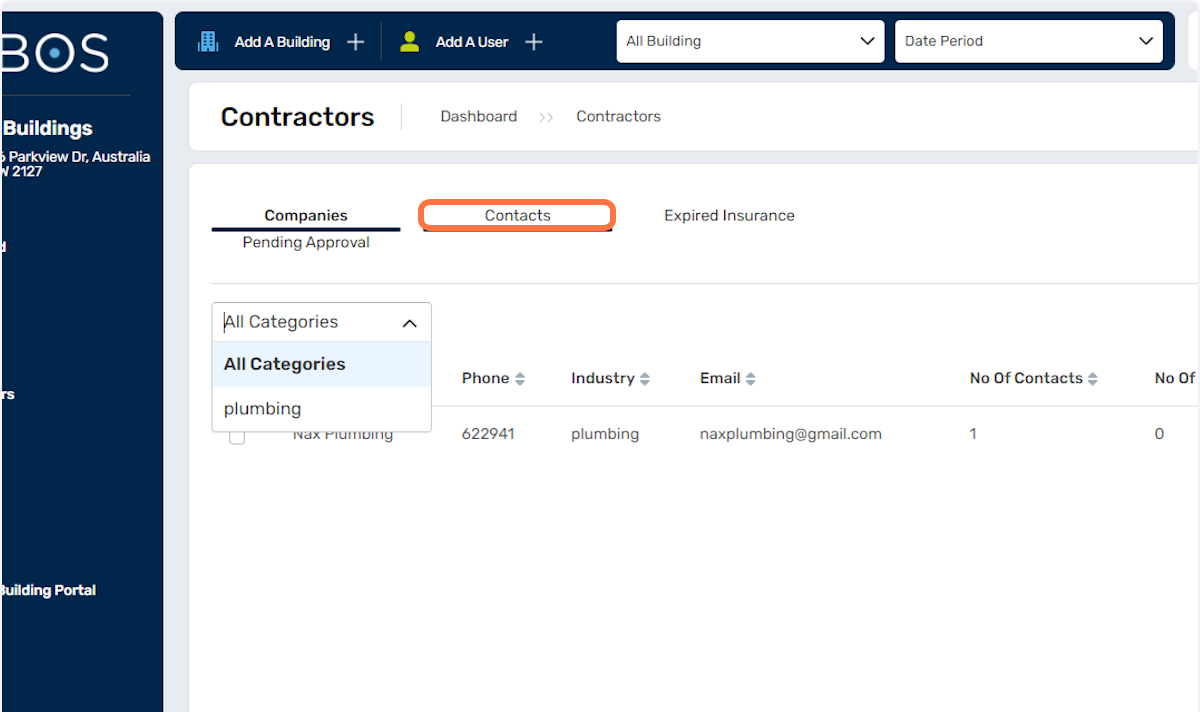
- If you need to find a specific contractor, we have filters that are available below. You can filter through the Category or the Industry Type:
- You can also filter through the Contact person:
- To monitor the insurances of the contractors, we have a designated filter for Expired Insurance as shown below:
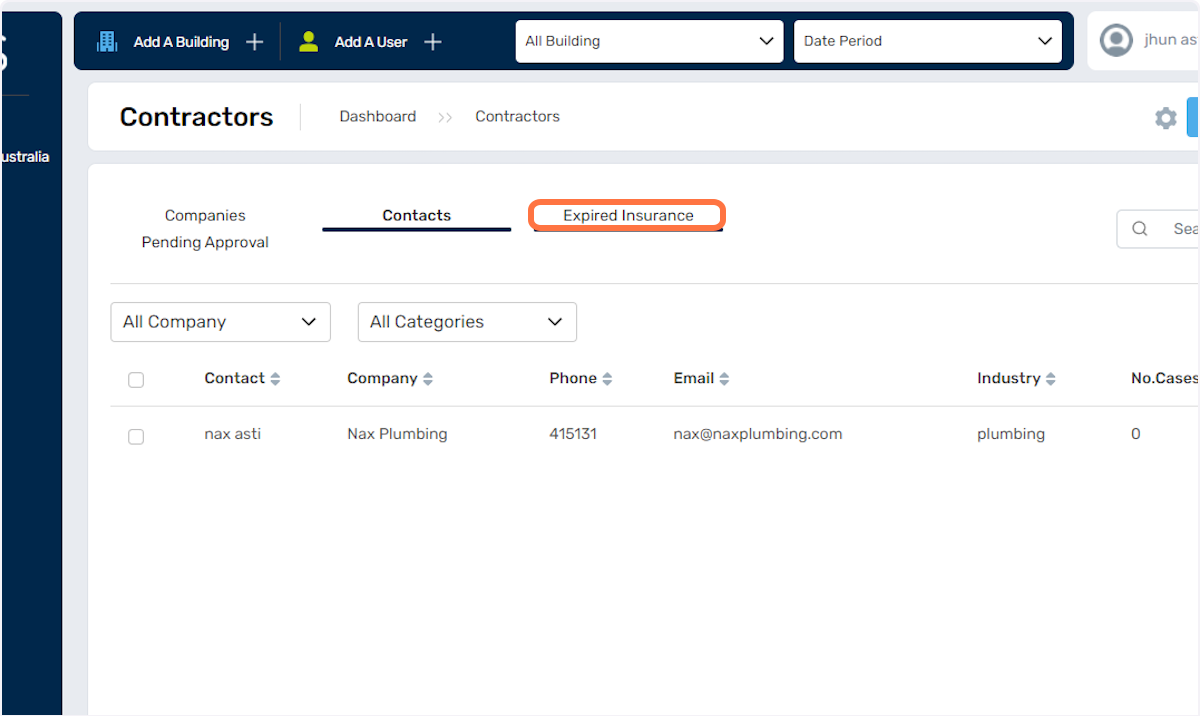
- You can also view pending insurances through the area below:
5. Security
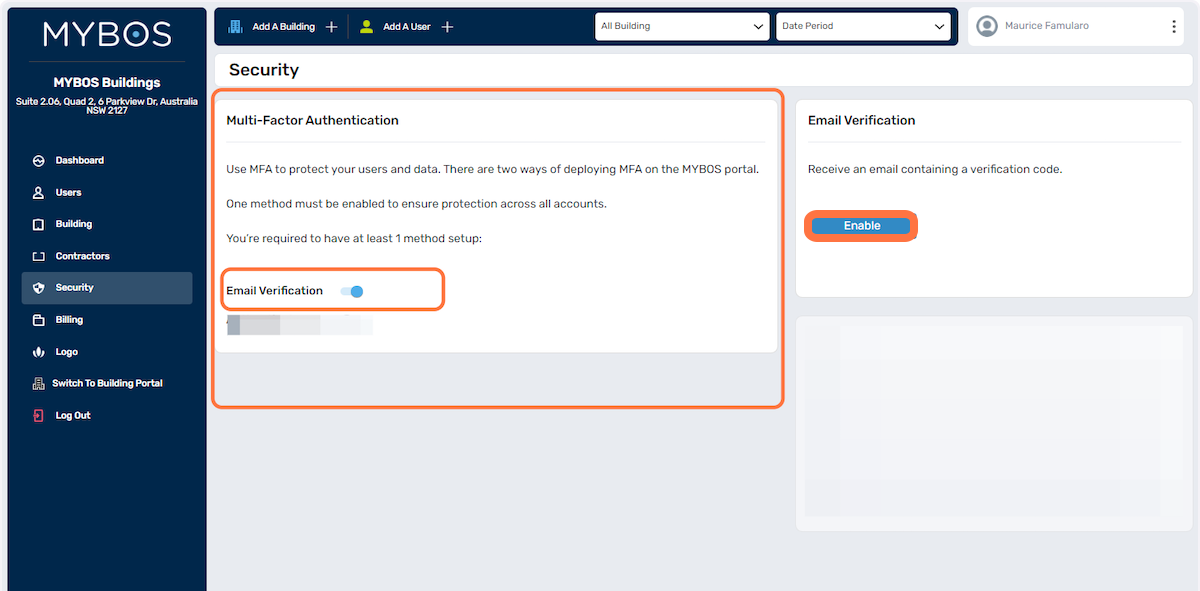
Mybos has implemented an additional layer of security for login purposes, specifically for Building Managers (BM), Facility Managers (FM), and other management roles.
Enabling Multi-Factor Authentication (MFA) for all BM/FM logins is a process that can only be carried out by your administrator, who possesses the necessary admin rights. By default, MFA is not enabled, but it is highly recommended by MYBOS to activate this feature.
MFA adds an extra level of protection by requiring users to provide multiple forms of verification during the login process. This helps safeguard sensitive data and enhances the overall security of your account. To benefit from this added security measure, it is advised to consult your administrator and request the activation of MFA for your BM/FM login.
- Ensure you are in the Company Portal for your account.
- Select Security from the left-hand menu.
- Under Multi-Factor Authentication section select the Email Verification slider to open
- Under the Email Verification section, click on Enable to enable this feature.
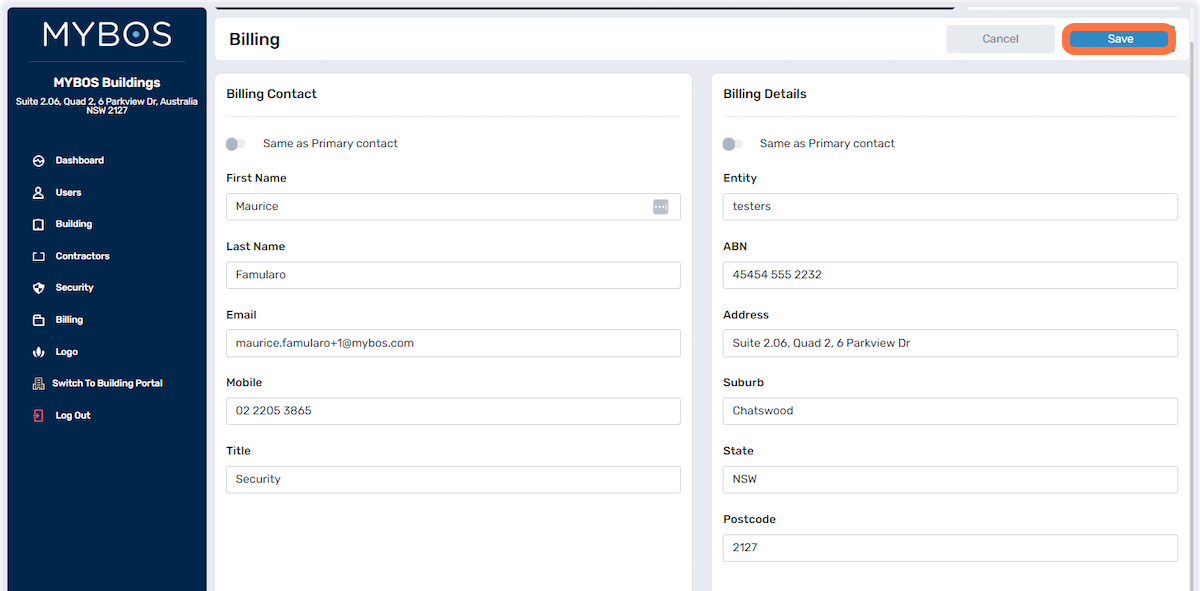
6. Billing
- From the Company Portal screen, click on Billing on the left-hand menu.
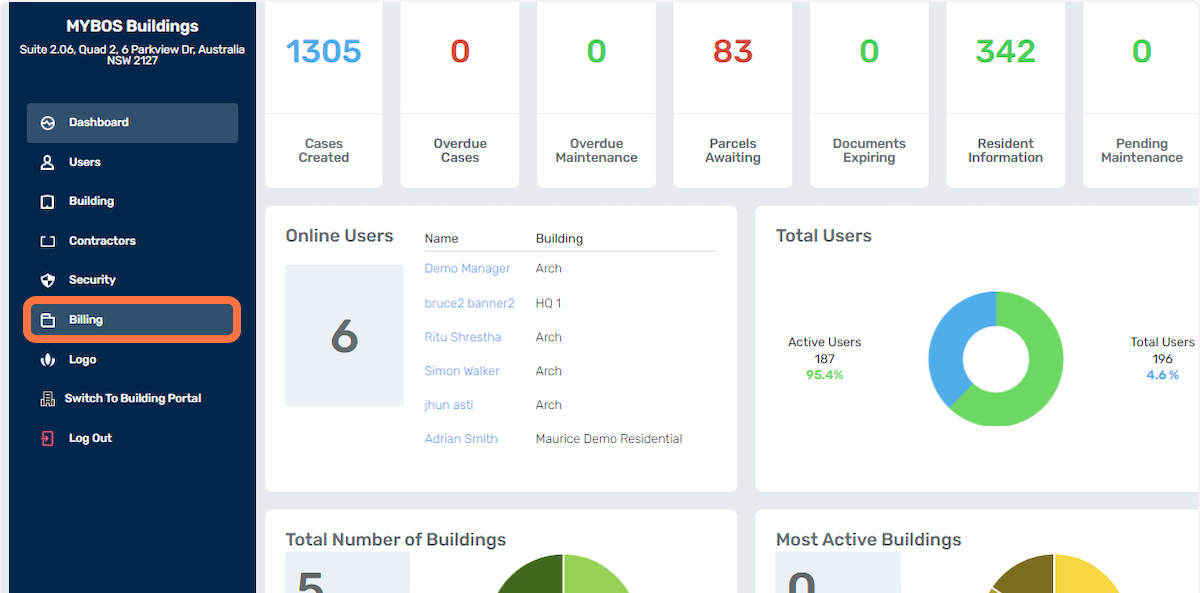
- View the Billing Contact and Billing Entity Details
- To edit the Billing Contact, select Edit, make your changes and then save.
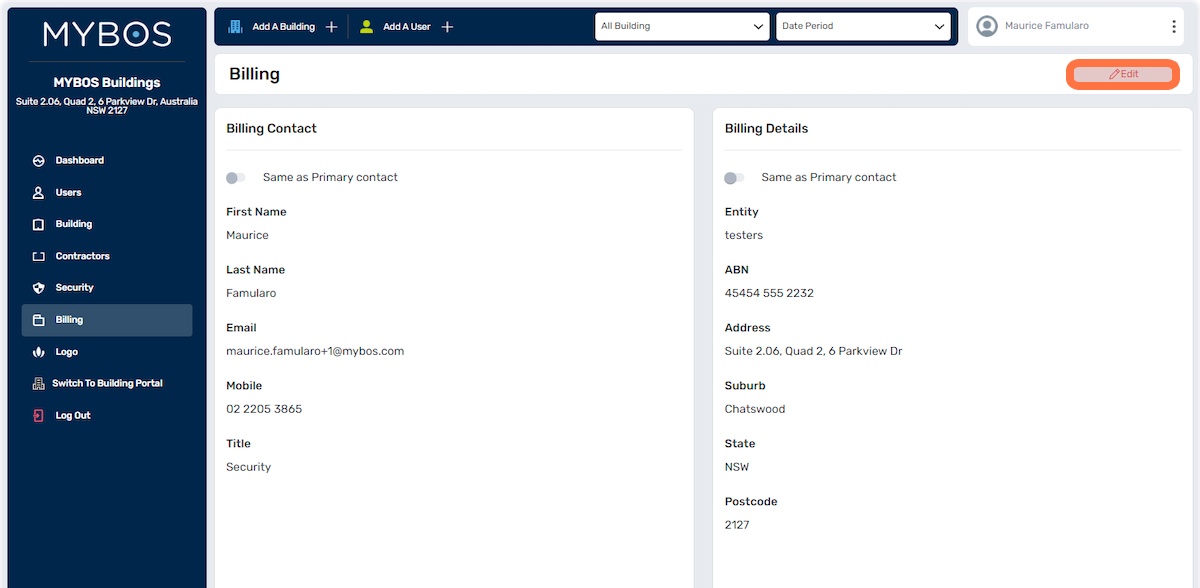
- Click Save to save your changes.
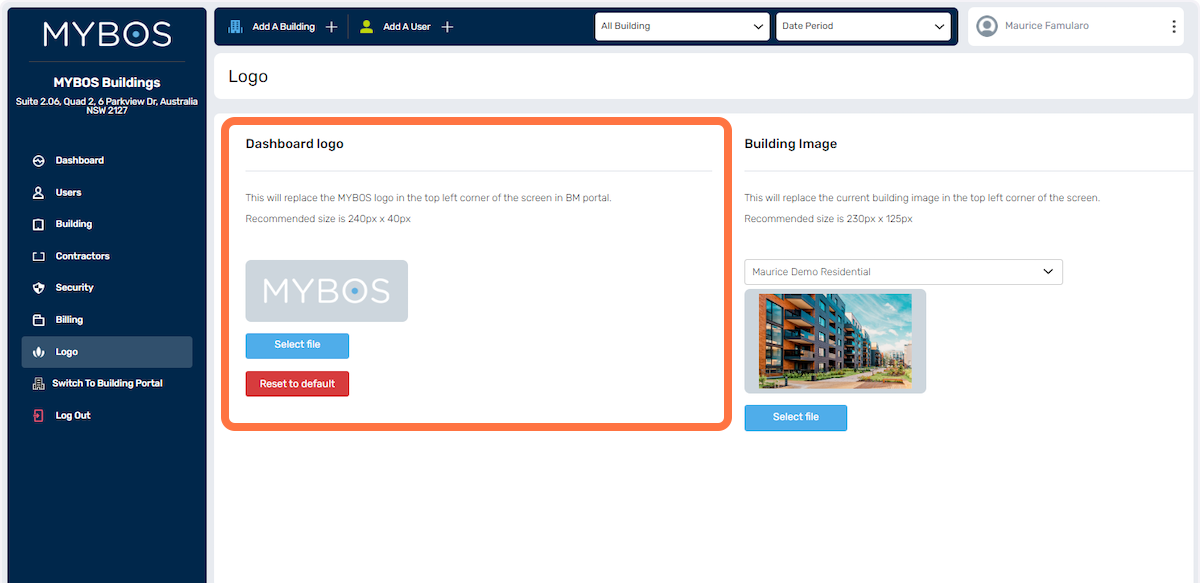
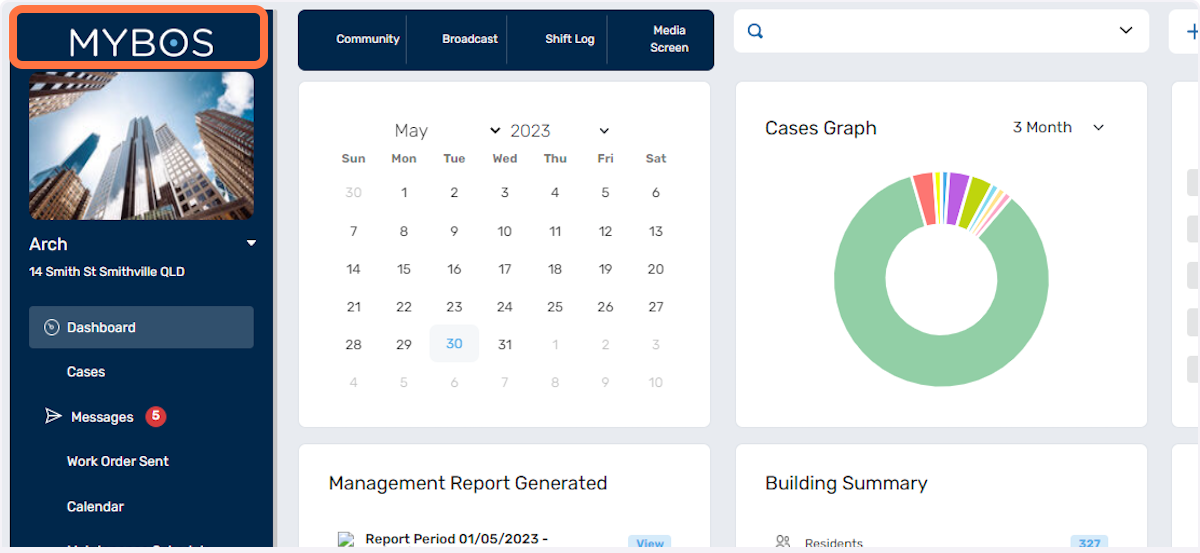
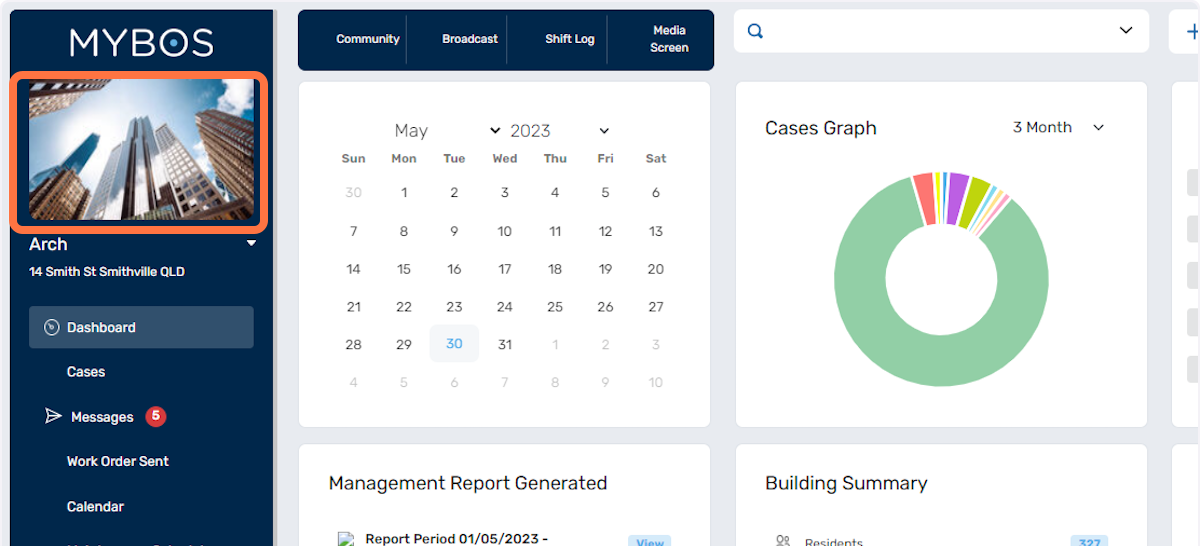
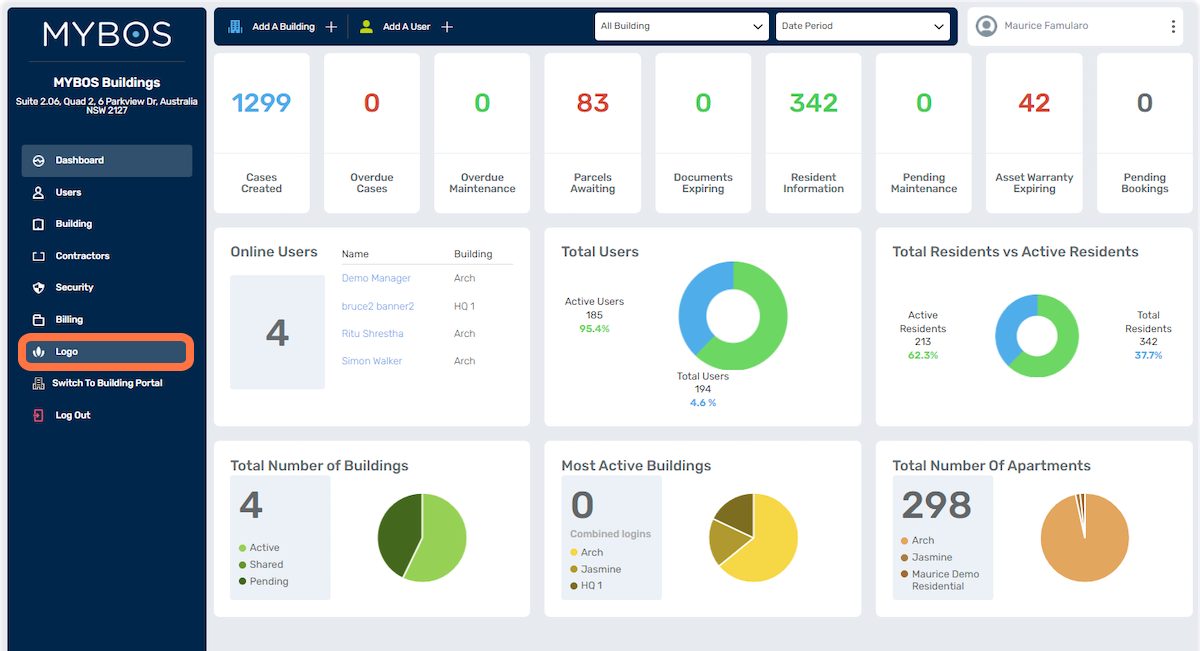
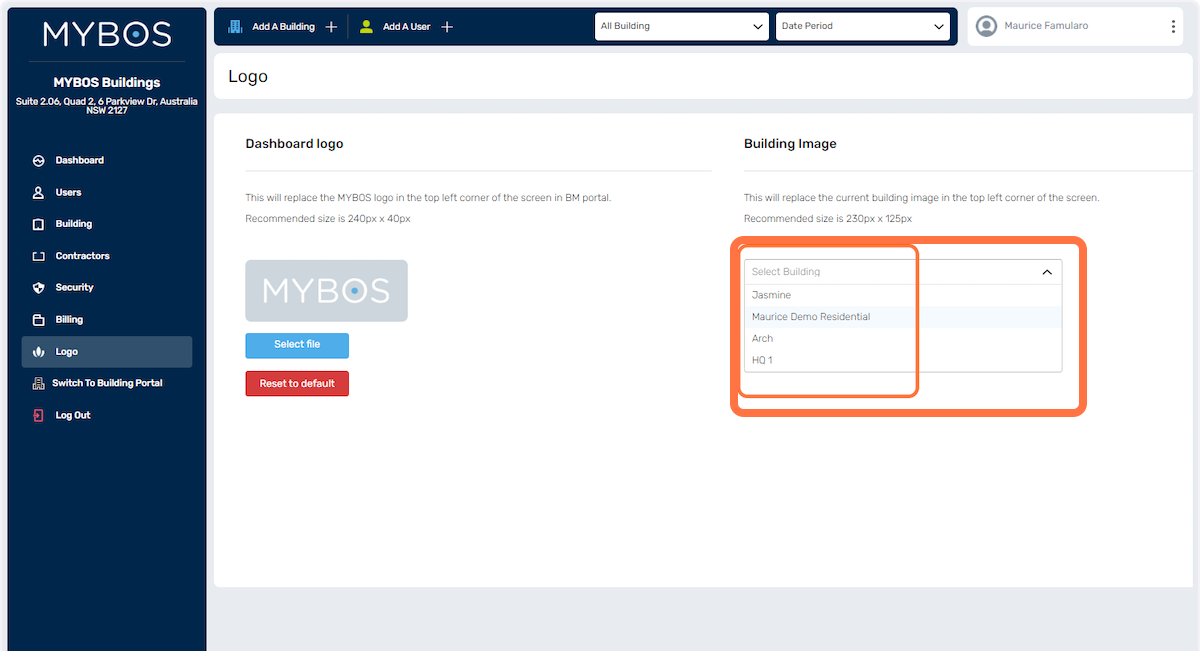
7. Logo
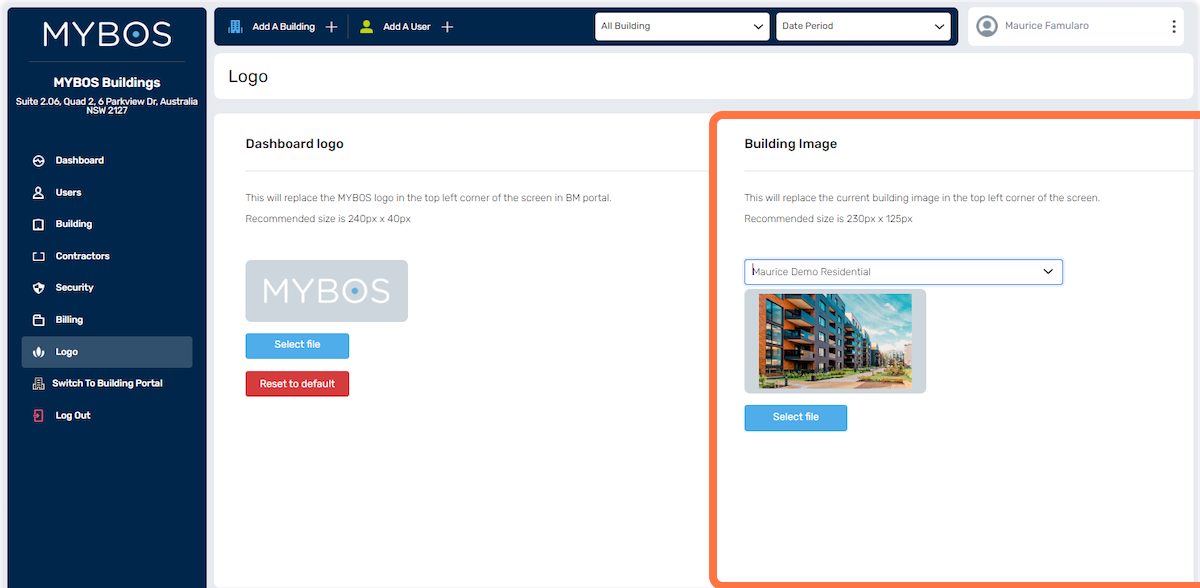
Dashboard Logo: Your logo will be prominently displayed on the top left-hand side of the screen. This allows for brand consistency and provides a personalised touch to the dashboard interface.
Building Image: Directly below the Dashboard Logo, you can upload and showcase an image representing the specific building or property. This image adds visual context and helps users quickly identify and associate the dashboard with a particular location or asset.
These two elements, the Dashboard Logo and Building Image, work together to enhance the visual appeal and branding of the dashboard, making it more engaging and tailored to your organisation's identity.
- Ensure you are in the Company Portal by selecting Switch to Company Portal.
- BM/FM users who do not have this option available will need to contact their management.
- To select this option, click on your name located on the top right of your screen.
- A drop-down menu will appear, select Switch to Company Portal

Once selected you will see the below Company Dashboard:
- Select Logo from the left-hand side menu
- Goto Select Building. If you are managing multiple buildings, you will need to select the building you would like to add or change the image.
Once selected, you will be able to select the image file and then save.- Repeat this above process for each building.
- Note that the image will be resized to 230px x 125px (where px = pixel).
- If your image becomes stretched or distorted, you will need to resize it to the correct px size.
- The Dashboard Logo will appear on your normal screen. You can replace the Logo with your own Logo, taking note of the recommended size which is 240px x 40px.
- To change the Dashboard Logo simply click on Select File and choose your Logo from your saved files and save.
- If your Logo appears distorted or incorrectly displayed you can select Reset to Default, which will reload the MYBOS logo