The Management Library holds the knowledge base for your building, and you can use it for storing any documents pertaining to your site including floor plans, warranties, manuals, service records and more.
Storing library documents provides you extra security and online backup as well as quick and easy access. Just as traditional library has sections, MYBOS library provides you the option of creating folders. The library is also searchable by document name which is really handy when you have a large number of documents.
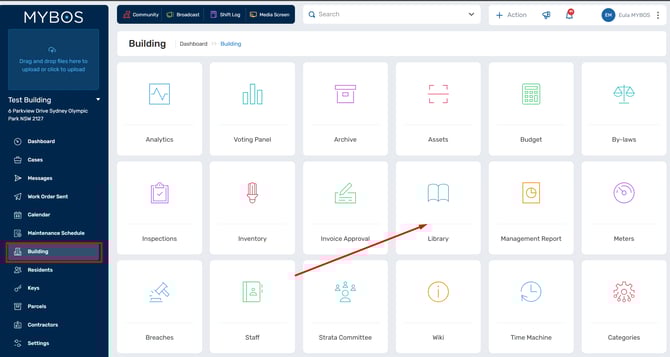
To get in to the Library, Click on the Building menu on the left and select the Management Library tab.
Creating a Library folder
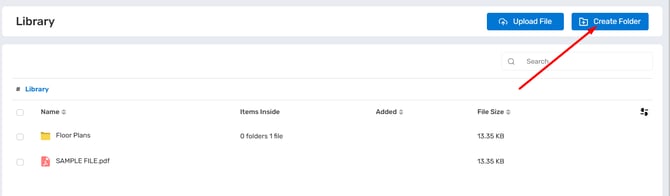
Step 1. In Management Library, you will see Upload File and Create Folder buttons in the top right corner. Click the Create Folder button.
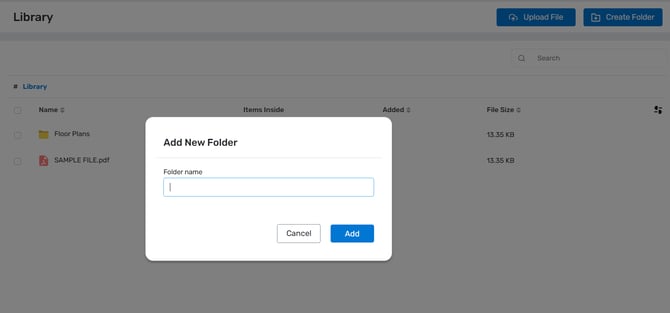
Step 2. In the pop up screen, enter the name of the folder you wish to add into the Management Library. Click Add to add your folder.
Uploading Files in the Library
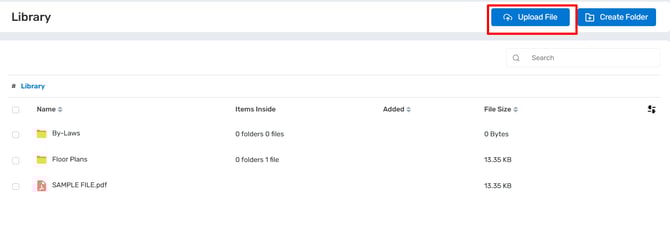
Step 1. To upload a file, click the Upload File button at the top right corner
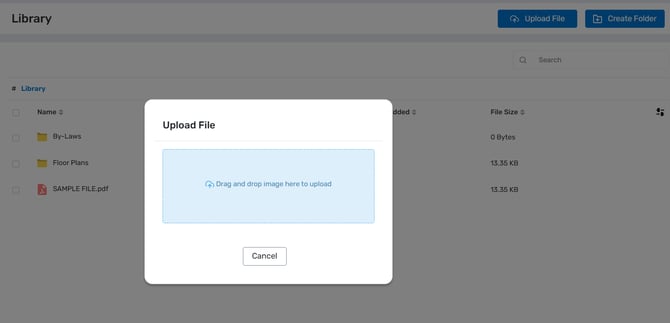
Step 2. In the pop up screen, you can either drag and drop your desired file, or click on the blue area to open your File Explorer. Repeat this step for all the files you wish to upload.
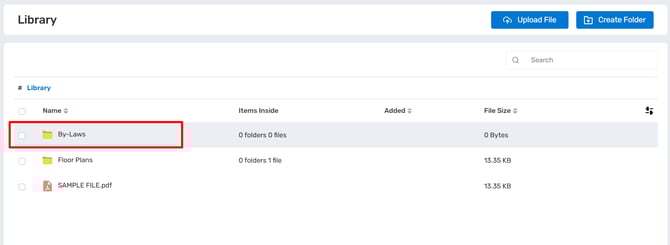
To upload a file in the folder you created, click on the folder name.
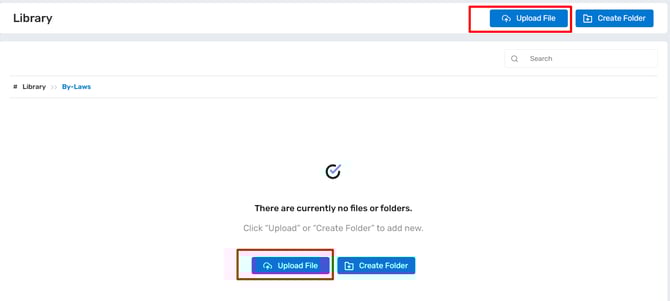
Once inside the folder, you'll still see the Upload File and Create Folder button in the top right menu. You can either upload a file or create a new sub-folder structure by following the steps outlined above.
Editing Files and Folders
Step 1. Tick on the checkbox next to the folder or file name you wish to delete, edit, download or move.
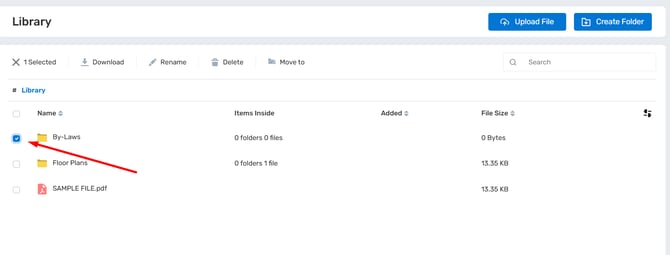
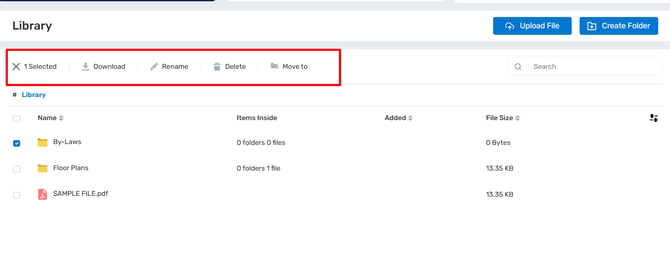
Step 2. Five new buttons will appear for your action
-
Selected: Displays the number of items you have ticked or selected.
-
Download: Click to save the file/folder to your computer.
-
Rename: Use this to edit or rename the file or folder.
-
Delete: Click to trash the file or folder.
-
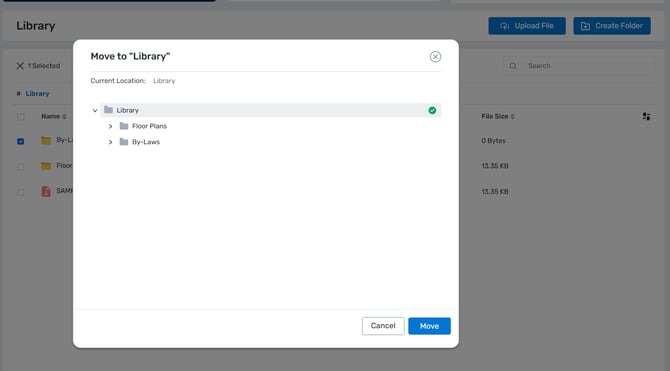
Move to: Use this option to move the file or folder to a specific folder within your Library.
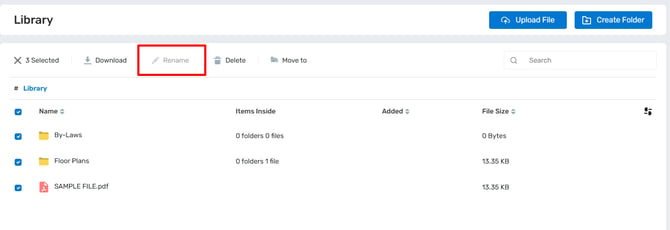
Note: If you select more than one file or folder, the Rename button will be greyed out since you can’t rename multiple items at the same time.
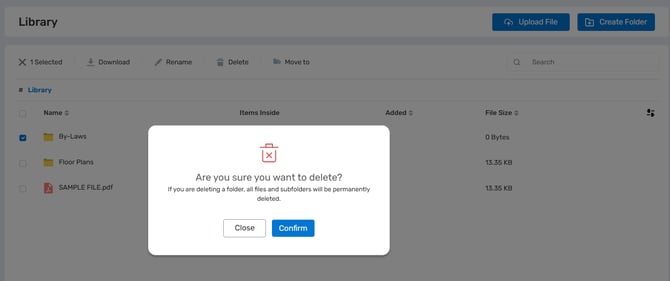
❗If you delete a file or folder, it cannot be recovered.
When you click the Delete button, a dialog box will appear for you to confirm the deletion. Click confirm to delete.
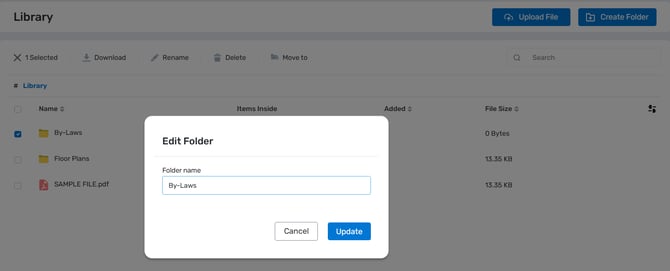
When you click Rename, it will be for editing/renaming the file/folder and will open in a pop up window for editing. Click Update to save your changes.
When you click Move to, a new panel will open displaying all the folders in your Library. From there, simply select the folder where you want to move the file or folder and select move to save.