
Learn how to create, edit, reorder and duplicate inspection templates across buildings, including how to organise areas and checklist items.
There are two kinds of inspection template:
- Common templates are for shared areas such as lobbies, hallways and fire stairs.
- Private templates are for individual apartments, for example an end-of-lease or pre-settlement inspection.
Where to find Inspections
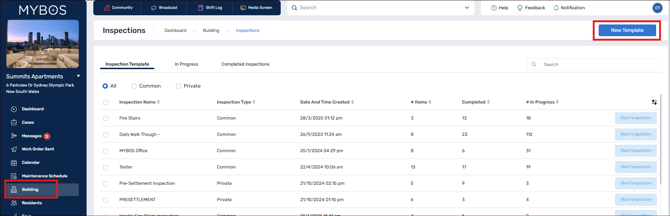
Select Building ➔ Inspections. The page has three tabs:
| Tab | What it shows |
|---|---|
| Inspection Template | Your saved checklists, with the inspection type, when each was created, the number of items, and how many inspections are completed and in progress. |
| In Progress | Inspections that have been started but not finished, with who started them and when they were last modified. |
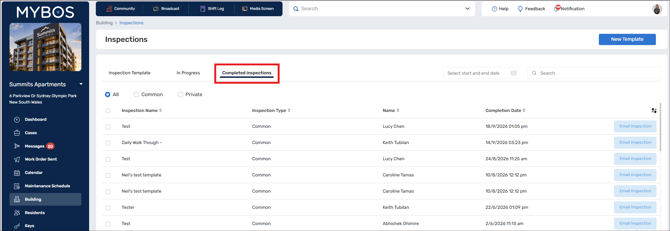
| Completed inspections | Finished inspections, with who completed them and the completion date. |
On every tab you can filter by All, Common or Private, and use Search to find an inspection by name.
How to Create a New Inspection Template
Step by Step Walkthrough
-
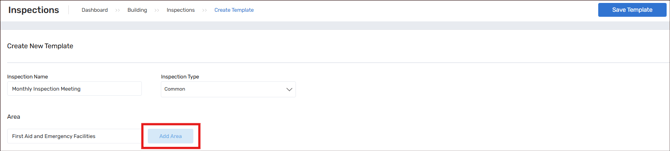
Common: if it is for common areas of the building, for example if the inspection template is for a building walkthrough.
-
Private: if the inspection is for the individual apartments/units/rooms within the building
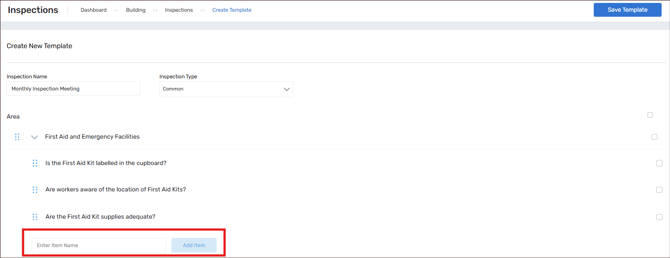
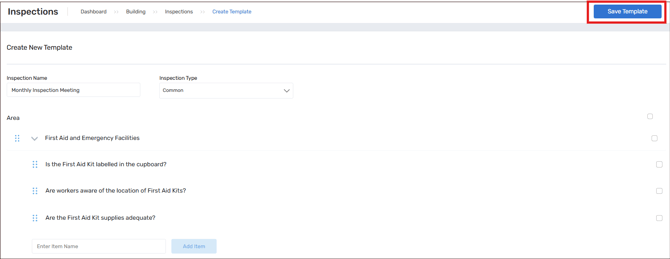
Step 6: Once completed click Save Template.
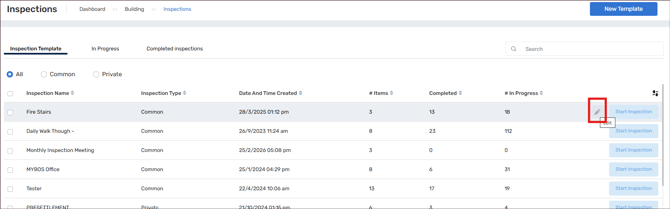
Step 7: You can edit pre-existing inspection templates by clicking the pen icon on the right side of the inspection. The pen icon appears when you hover over the inspection.
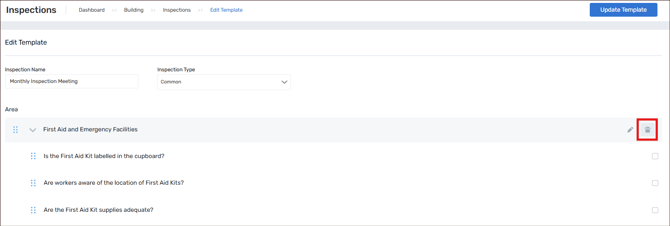
Step 8: To delete any Area/Item, hover over the title and click on the Trash icon to the right.
❗Note: Deleting an Area will delete all Items underneath
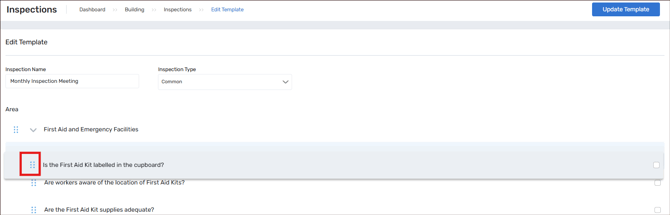
Step 9: To reorder Inspection Templates by Areas, you can drag and drop to adjust by clicking on the six dots.
Step 10: Click on Update Template to save changes.
Running an Inspection
Step 1: On the Inspection Template tab, find the template you need and click Start Inspection.
Step 2: Work through each item - you can either Pass or Fail. Add comments and upload photos where they help. If you're using a phone, clicking the photo icon will open the camera to take a photo immediately.
Step 3: Save your progress as a draft to finish later, or complete the inspection.
Drafts appear on the In Progress tab. Click Resume beside one to pick up where you left off.
Converting Inspection Items into Cases
If you come across an inspection item that requires contracting work to Pass (e.g. broken window), you may find it useful to convert the inspection item directly into a case.
Step 1: Go to Building ➔ Inspections and open the Completed inspections tab.
Step 2: Click the inspection that contains the item, and expand the area using the chevron to show its items.
Step 3: Click the wrench icon at the right-hand end of the item.
Step 4: When MYBOS asks "Are you sure you want to convert this item to a Case?", click Confirm. Click Cancel if you don't want a case.
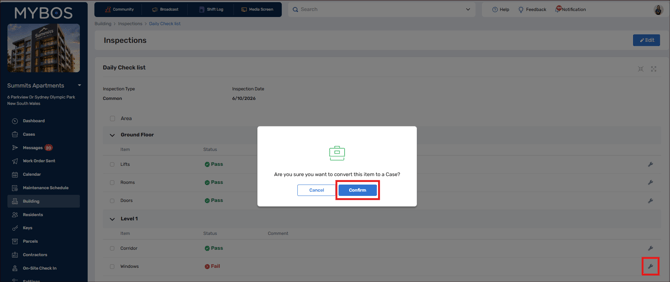
Step 5: Once Case is created, you can find this via the left hand menu Cases, and it will be at the top of your list.
Reviewing Completed Inspections
Finished inspections move to the Completed Inspections tab. Use Select start and end date to narrow the list to a date range. Click on an inspection to see its comments and the result for each item, and edit and save it if something needs correcting.
Sharing and reporting on inspections
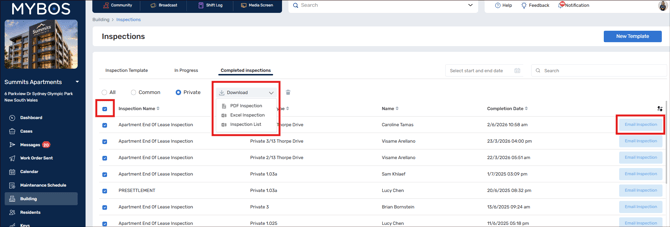
- Click Email Inspection beside a completed inspection to send it by email.
- To build a report, tick one or more completed inspections, then open the Download drop-down above the table. The options are PDF, Excel, or an Excel inspection list. Ticking several inspections combines them into one report.
Managing templates
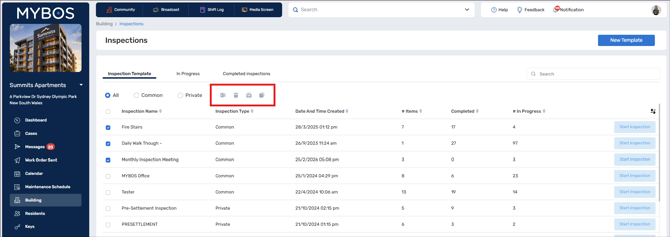
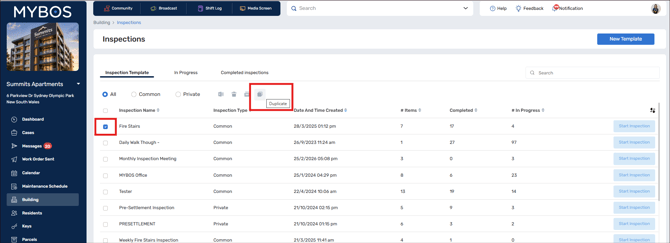
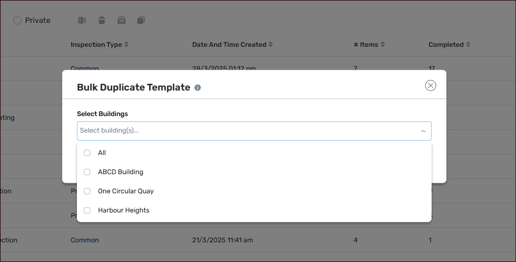
Tick a template on the Inspection Template tab and icons appear above the table so you can export it to Excel, archive it, delete it or duplicate it. Archived templates go to the building's Archive, where you can restore them later (Building ➔ Archive ➔ Inspection).
Duplicating Inspection Templates
Tips and FAQs
Should I use a Common or Private template? Use Common for shared areas of the building and Private for individual apartments. The type is chosen when you create the template.
Can I stop partway through an inspection? Yes. Save it as a draft and it appears on the In Progress tab, ready to resume.
Can I do inspections on my phone? Yes. Templates can also be completed in the MYBOS BM mobile app.
How do I get a copy of the results? Tick the completed inspections, then use Download for a PDF or Excel report, or use Email Inspection to send one.
I no longer need a template. What should I do? Archive it rather than delete it. Archived templates can be restored from Building ➔ Archive.
Can I change an inspection after it is completed? Yes. Open it from the Completed inspections tab, make your changes and save.