Maintenance schedule is simply your preventive maintenance plan for the building. It involves regular servicing, repairs or maintenance of the building assets, equipments and facilities to ensure that everything operates safely and efficiently.
How to Create a Maintenance Schedule
💡 Maintenance Schedule is for planned, repeating preventative tasks. Cases are for one-off reactive jobs.
Step by Step Walkthrough
Step 1: Navigate to the Building Manager Web Portal dashboard.
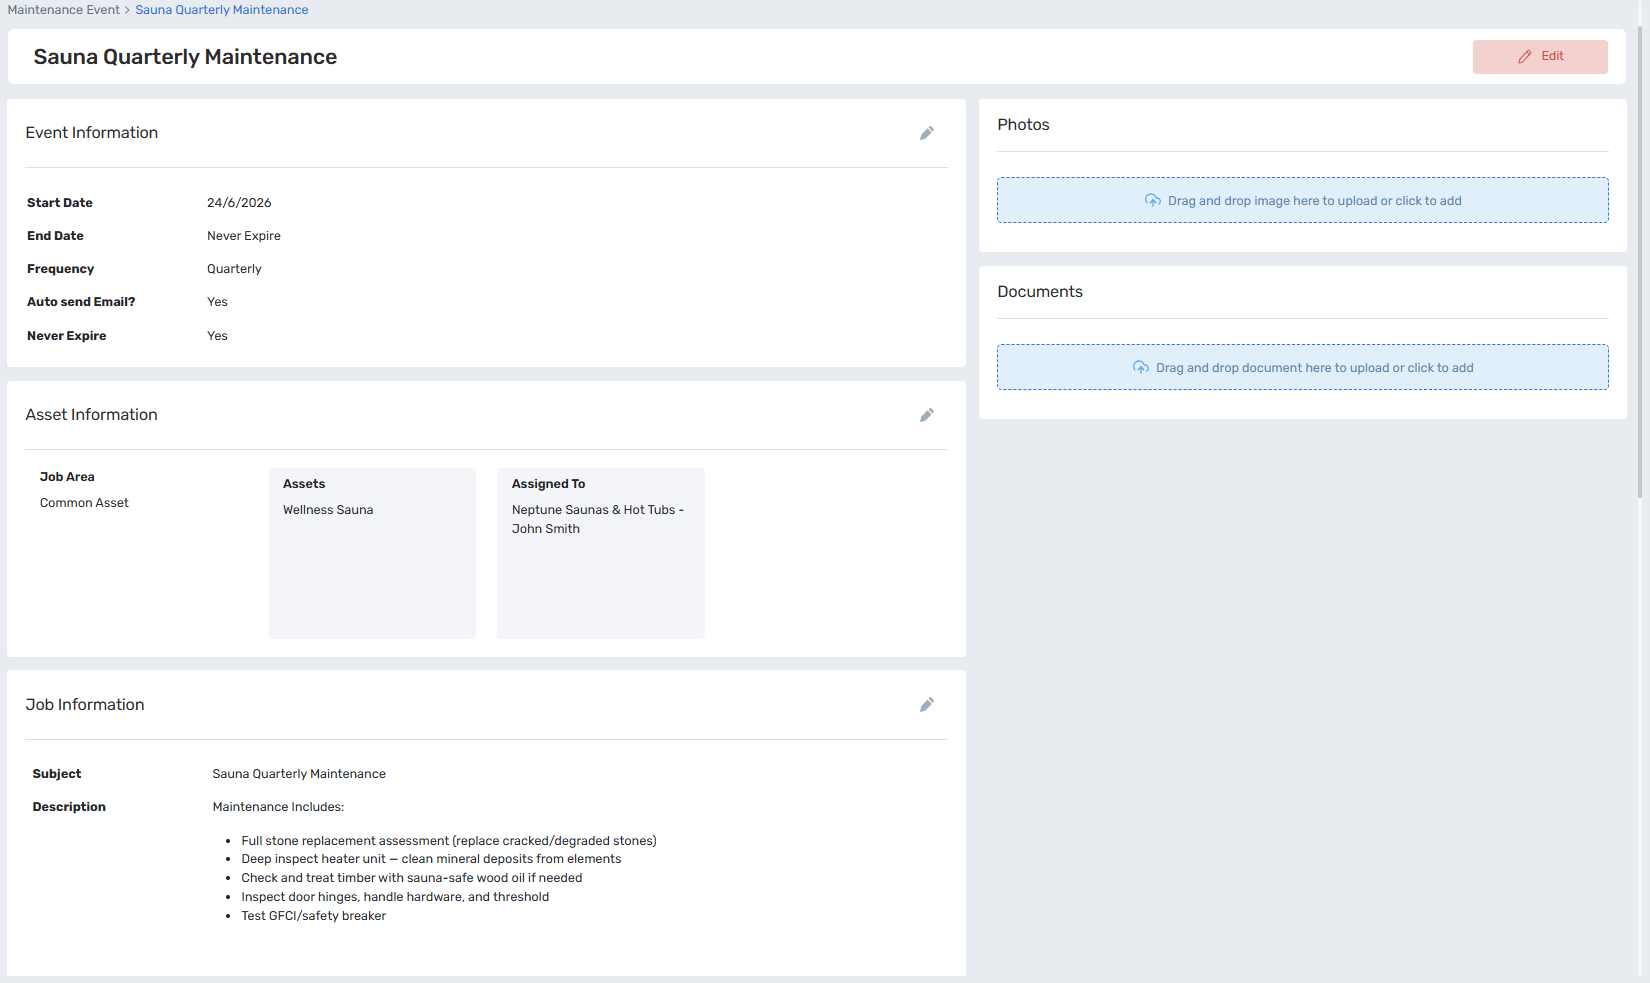
Step 2: Select Maintenance Schedule in the left hand menu. A form will open with three sections. Event Information, Asset Information and Job Information.
Step 3: Click "New" to create a new Maintenance Schedule in the top right corner. A form will open with three sections: Event Information, Asset Information, and Job Information
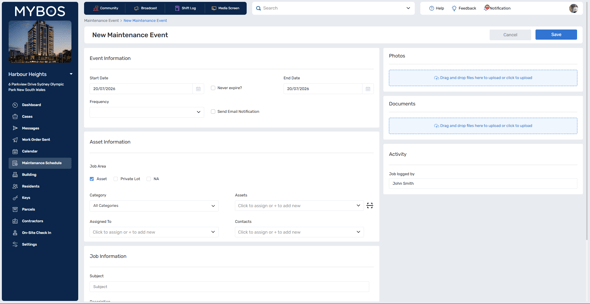
Step 4: Fill in the event information. This is what controls scheduling including start/end dates, recurrence frequency, and email reminders.
💡 Email notifications go to contacts assigned to the event. Make sure contractor contact details are up to date before setting this up.
Step 5: Attach the Asset and assign the contractor. If you have already set up all your assets beforehand (highly recommended) you can easily select the asset and the preferred contractor will be connected. You can also add other contractors or create an asset from this menu
❗If the wrong contractor is auto-populating, check and update the asset record under Building → Assets
Step 6: Fill in the Job Information. This is sent directly to the contractor so it is recommended to be as specific as possible.
Step 7: Add photos and/or documents by clicking the blue upload box.
Example documents can include
- Photos → before service photos or reference images for the contractor
- Documents → service agreements, checklist, compliance certificates, or maintenance manuals.
Step 8: Press Save to finalise the maintenance schedule.