MYBOS helps building managers manage amenity bookings from one centralised platform. Managers can configure facilities, set booking times and capacity, control availability, accept payments, send reminders, and restrict access to approved apartments.
How to Configure Amenity Bookings
Step by Step Walkthrough
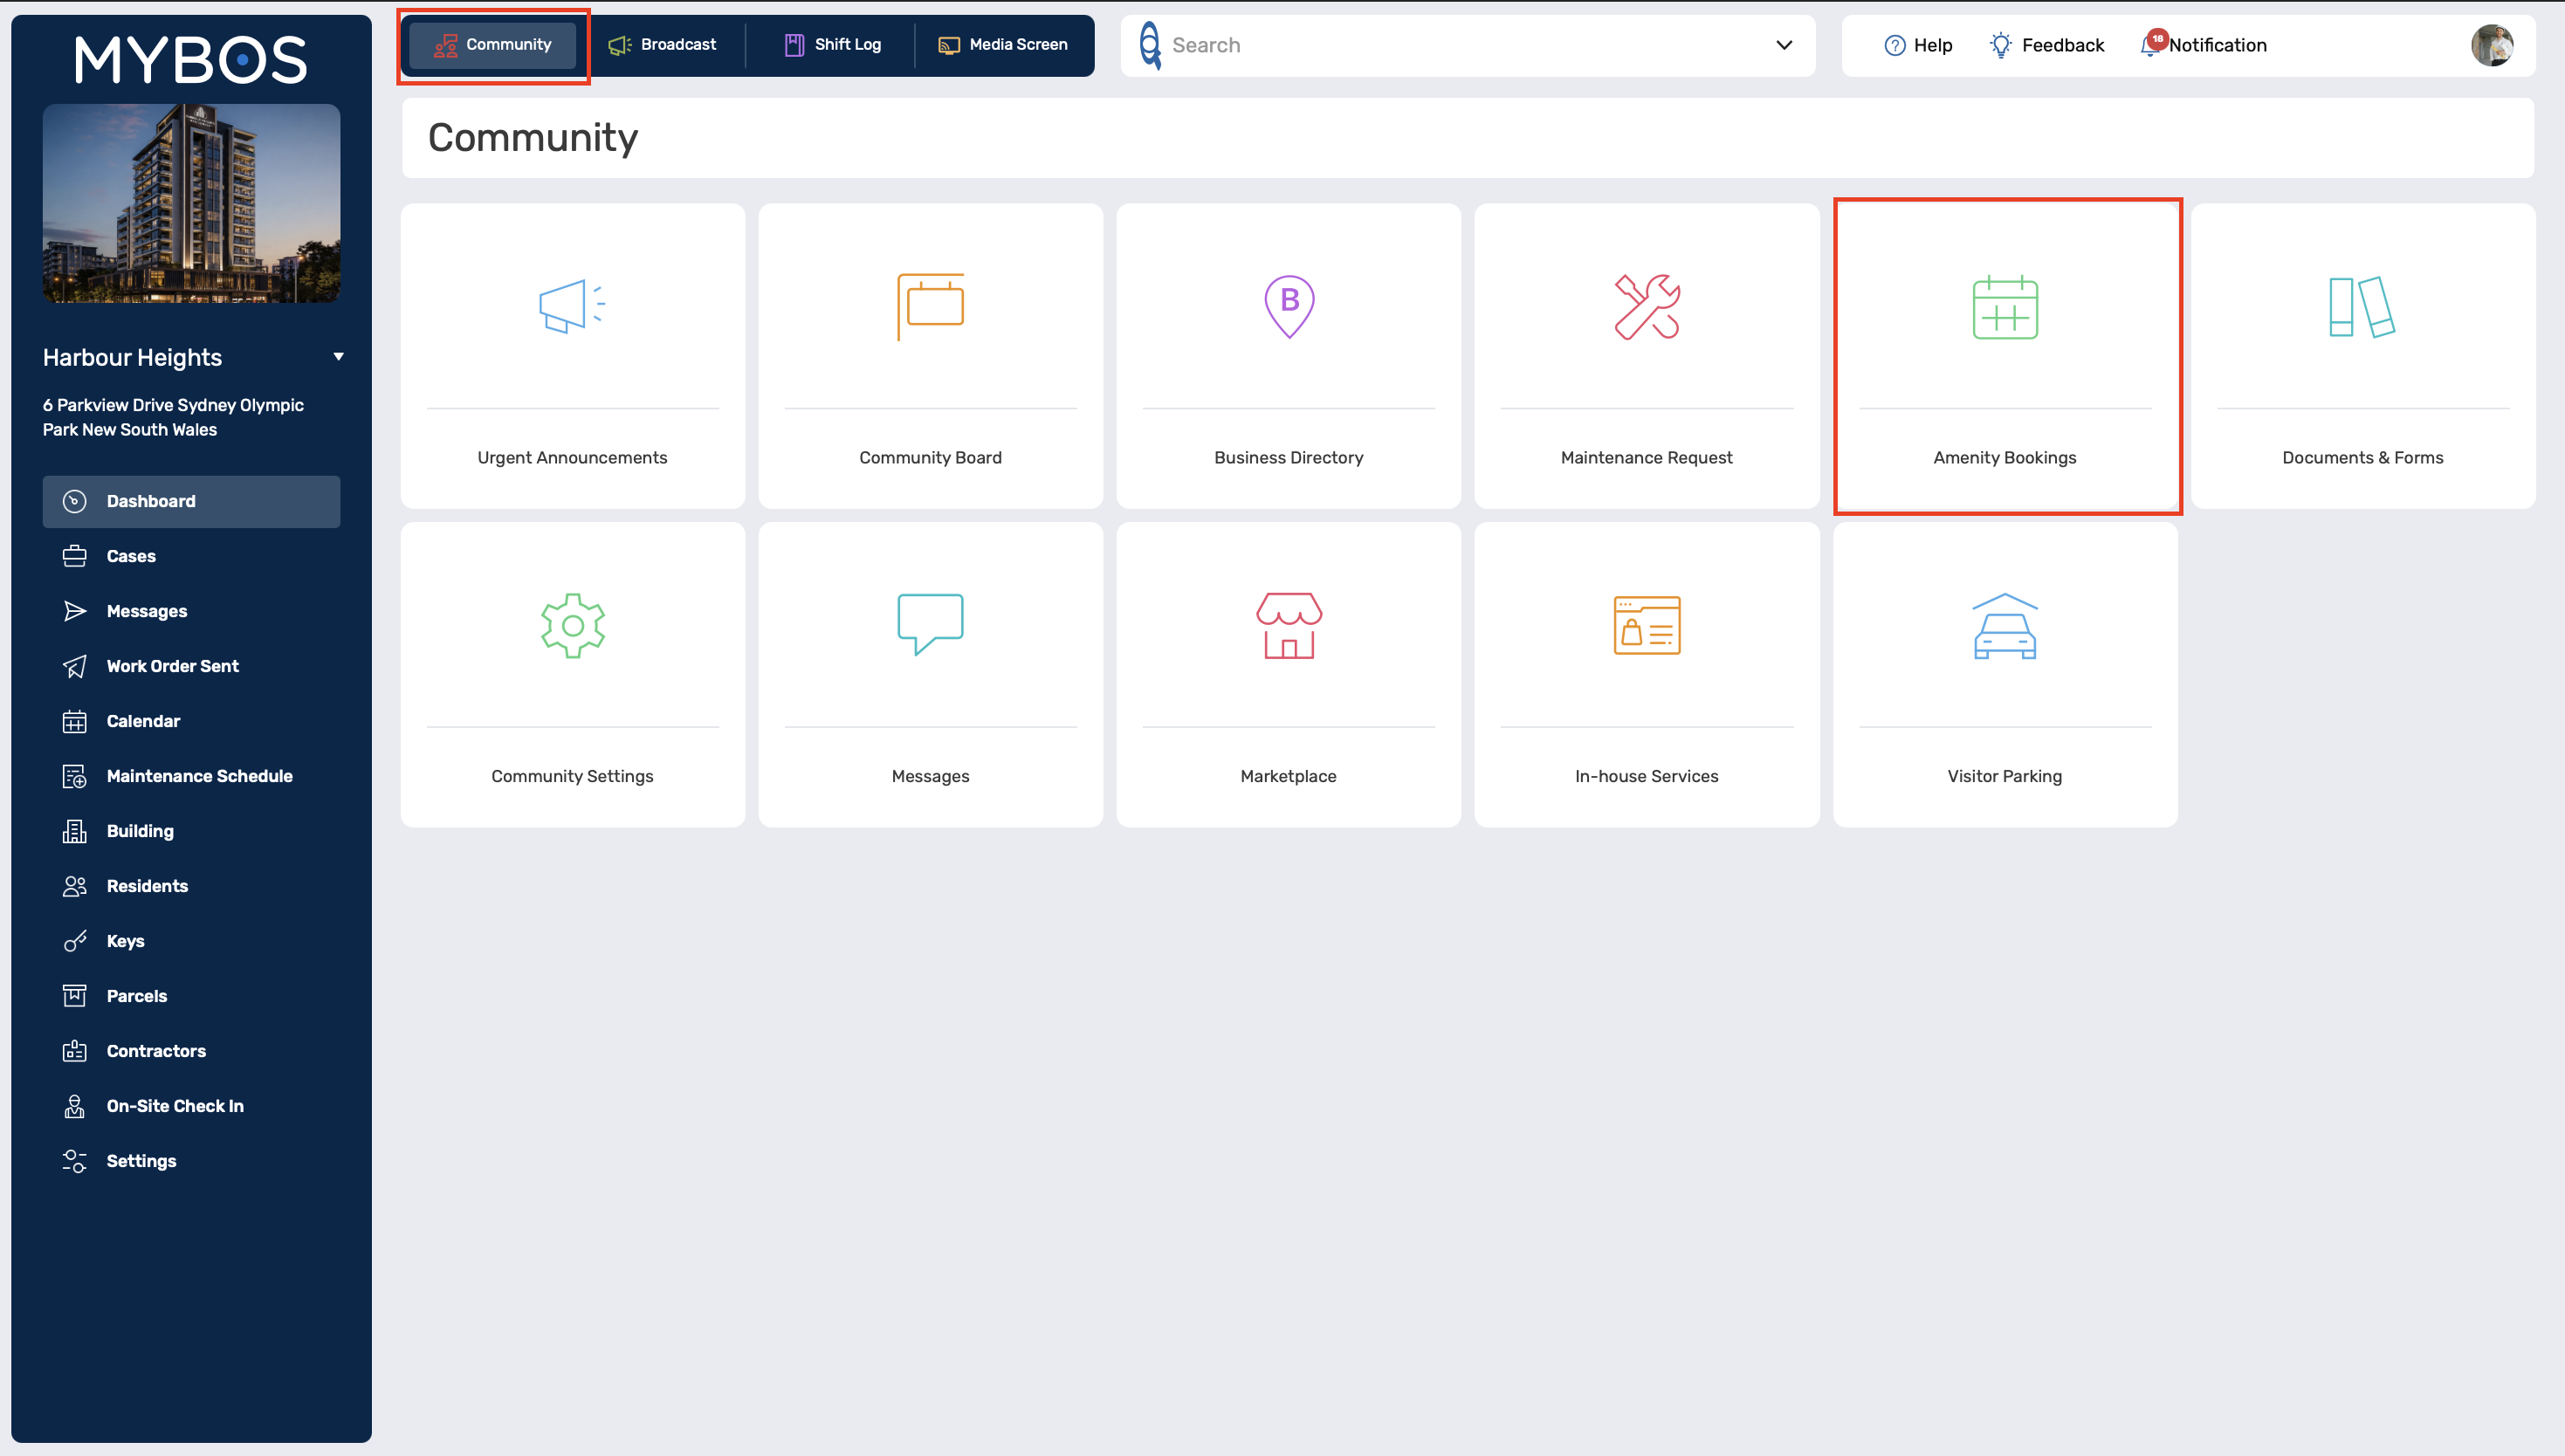
Step 1: Navigate to the Amenity Bookings page by clicking the Community tab in the top left. Once opened, click the Amenity Bookings widget
 Click to Enlarge
Step 2: To add a new Amenity click the blue "Add or Edit Amenity" button next to "New Booking"
Step 3: In the settings page, click the "+" button in the top left to begin adding a new Amenity.
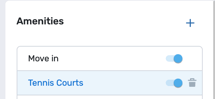
Step 4: A pop up will appear for you to add the name of the amenity. Fill in the details and press Add to finalise
Step 5: After adding an amenity, eight configuration menus will appear on the right-hand side. Much of the information is pre-filled based on typical amenity settings, but we recommend reviewing and customising each option to suit your requirements.
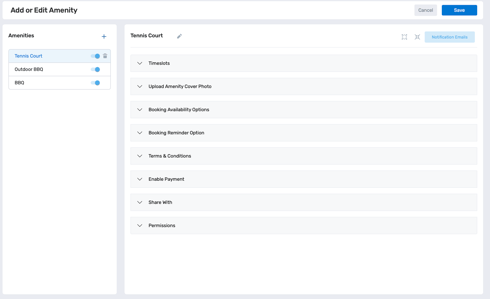
Configuration Settings Walkthrough
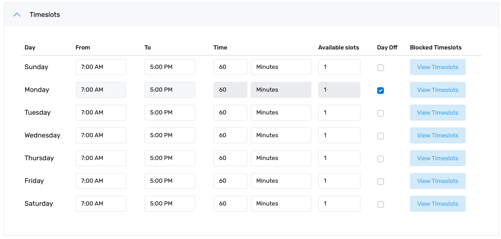
Step 6: Timeslots:
- From and To - the timeframe the booking can be booked during.
- Time - this is for the length of timeslots, for example if it's set for 60 minutes then the timeslots available to be booked will be in increments of 60 minutes between the configured "from" and "to" timeframe.
- Available Slots - this is for the amount of bookings that can be made for each time slot, eg. if you have 2 tennis courts you could allow for 2 bookings at a time.
- Day Off - this is if the amenity is not available to booked on the selected day every week.
- Blocked Timeslots - this allows you to block off a timeslot each week, if there is a meeting each week, or the cleaner is cleaning at that time each week.
Step 7: Upload Amenity Cover Photo:
You can choose your own or from our library of icons
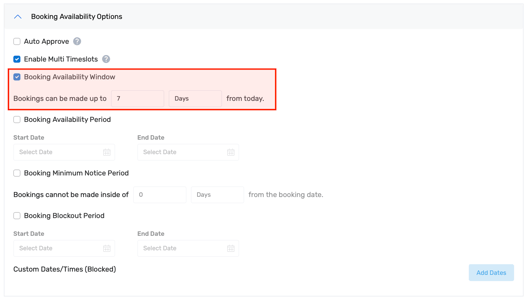
Step 8: Booking availability options:
- Enable Multi Timeslots - this allows for a resident to book multiple timeslots at once. E.g. 9am - 10am and 10am - 11am.
- Booking Availability - if you are only wanting residents to be able to book x days in advance.
❗If you plan on holding payments, we recommend to set the availability window to 7 days, to line up with Stripe's 7-day payment holding period.
- Set Available Booking Date Period - if the amenity is only available to book during a set period of time you can enter a date range.
- Select Blocked Date - if the amenity is unavailable to be booked during a set period you can enter the date range.
- Custom Blocked Dates/Times - if you need to setup a specific time that it is unavailable or setting for a day off.
Step 9: Booking reminder option:
You can set to add a reminder for the resident x amount of days before the booking.
Step 10: Terms and Conditions:
Input your own terms and conditions that align with your amenity.
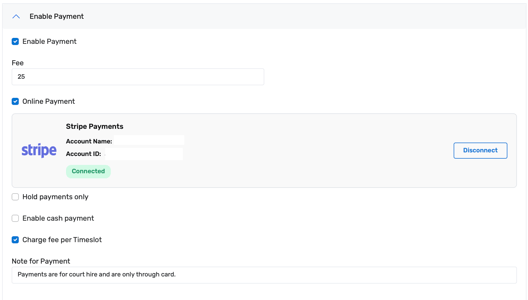
Step 11: Enable payment:
If you need to take a payment tick the checkbox to turn this feature on.- Fee - enter the amount for the fee.
- Connect with Stripe - select the button to connect the Stripe account. A pop up will appear asking you to select the account to associate with the Amenity.
❗If you do not have Stripe set up already, a detailed set up guide can help you configure stripe here.
- Enable cash payments - ticking this option will allow for residents to submit a booking without making a card payment.
- Charge fee per Timeslot - if you are allowing for multiple timeslots to be booked, if this is ticked they will be required to pay a fee for each timeslot.
- Note for Payment - you can enter a note for the resident to see.
Step 13: Permissions
If an Amenity is only available to be booked by certain apartments in your building, you can set the permissions here and block other apartments so the amenity will not be visible in their booking options. Simply click "Set Permissions" and toggle which apartments have access to the Amenity.
Step 14: Once you have finished all the configuration options for your Amenity, click the Save button to apply the changes.
Step 15: If you ever need to disable and re-activate an amenity, you can turn the toggle on and off.